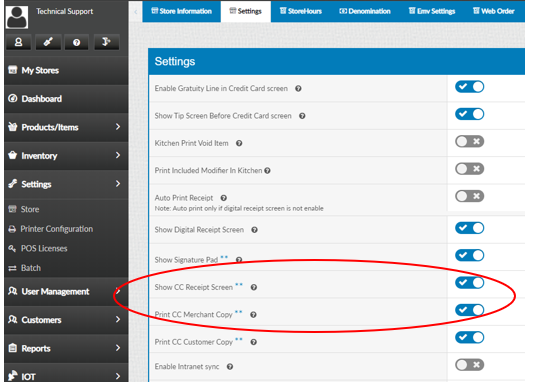
Batch and Tip Adjustment
To Check your “Batch Submit Device” and Check the “Default Batch Payment”:
Select “Settings”, “Store”, “Settings”
Scroll down and you will be able to customize the batch options
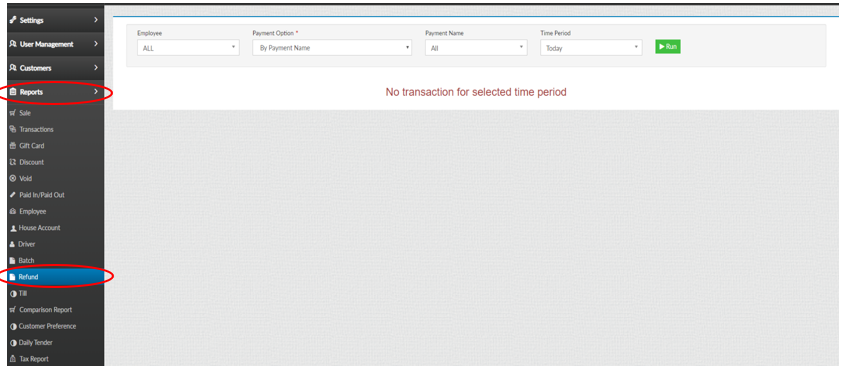
How to View Stuck Offline Transactions on the Back of House:
Under “Settings” select “Batch” Here you will be see the Offline Transactions that are stuck
Selecting “Auto Batch” you will be able to set a time for the system to auto batch for you instead of going in manually and batching
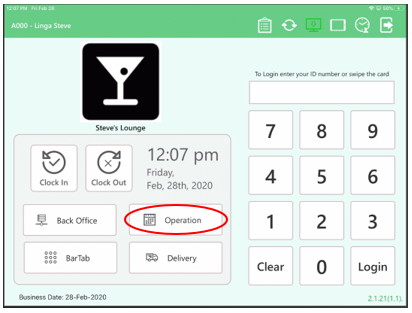
How to make Tip Adjustments:
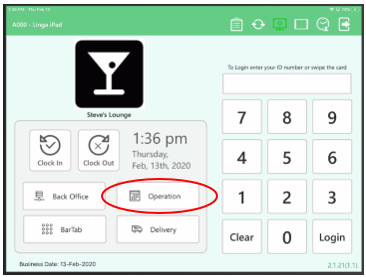
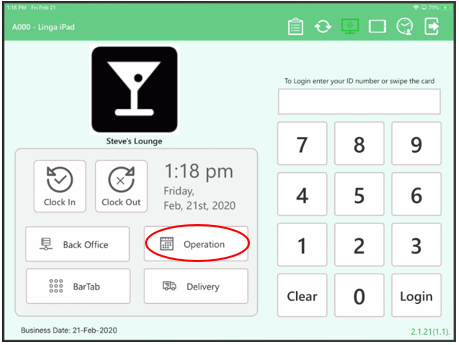
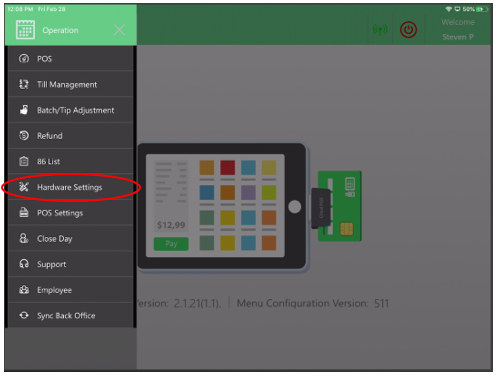
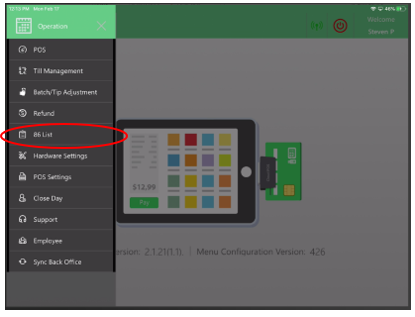
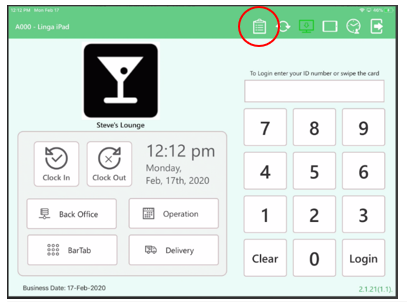
Select “Operation”
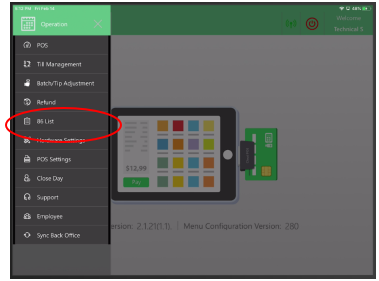
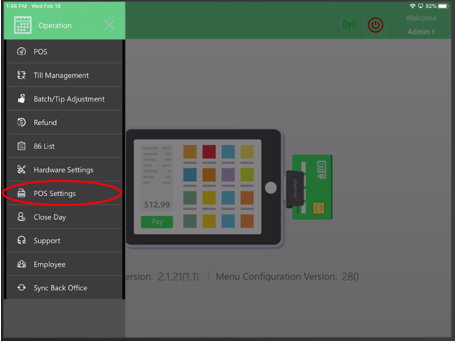
Select “Batch/Tip Adjustment
Select on the “Tip” that needs to be adjusted
Change the Tip amount and press “Continue”
Tip has been adjusted successfully
How to Batch on the Front of the House:
Select “Operation”
Select “Batch / Tip Adjustment”
You will be able to “Submit Batch
NOTE: You must finalize all tips BEFORE you submit the batch
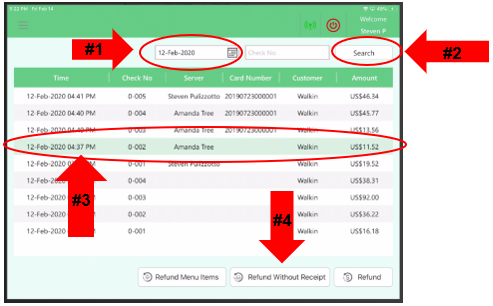
How to “Process Offline” Batch:
Select the transaction that needs to be processed offline (Transactions in Red), then select “Process Offline”