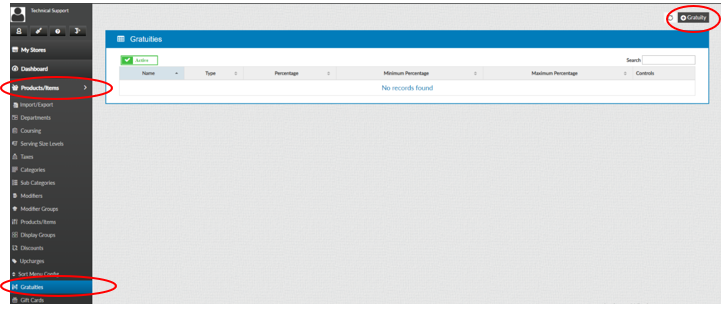
Gratuities
Creating Gratuities:
“Products/Items”, “Gratuities”, “+Gratuity”
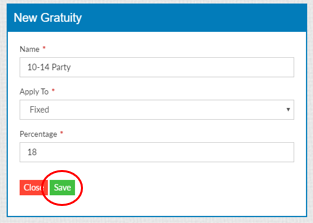
Creating Fixed Gratuity:
After making the gratuity select “Update”
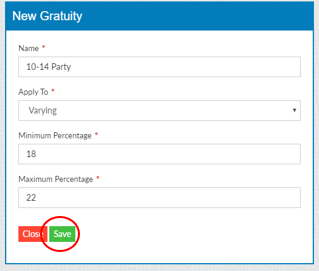
Creating a Varying Gratuity:
After making the gratuity select “Update”
Online Front of House and Back of House training for Nextera POS
Creating Gratuities:
“Products/Items”, “Gratuities”, “+Gratuity”
Creating Fixed Gratuity:
After making the gratuity select “Update”
Creating a Varying Gratuity:
After making the gratuity select “Update”
Hold the power button down for 3 seconds until the blue light flashes

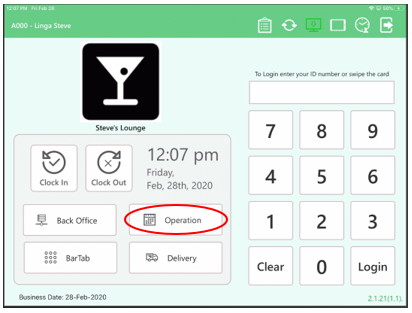
Go to “Operation”
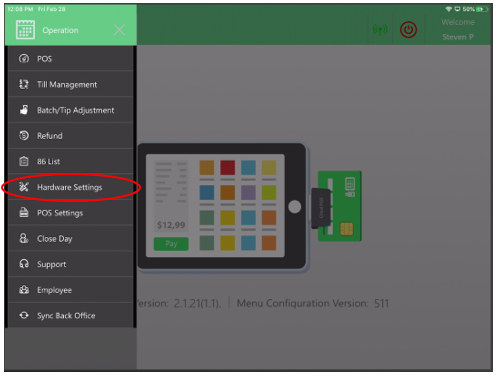
Select “Hardware Settings”
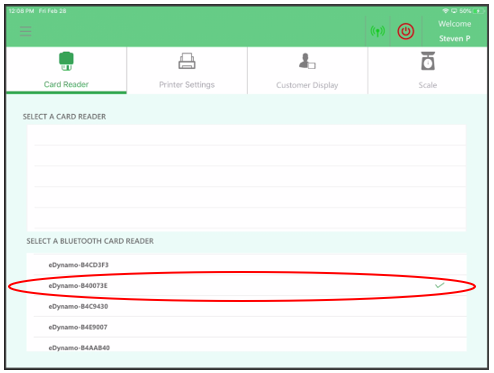
Select the eDynamo that you are connecting and after selecting a “Check Mark” will appear.
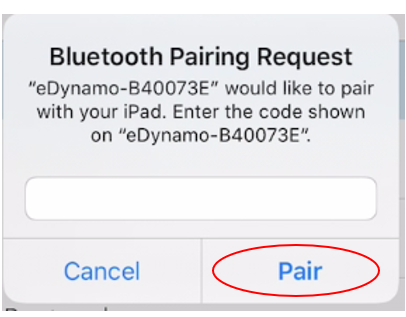
Enter “0000” and select pair. PLEASE NOTE: IF A DEVICE HAS BEEN REVIOUSLY PAIRED, YOU MAY NOT SEE THIS OPTION.
ONCE YOU’VE COMPLETED THESE STEPS, PLEASE RETURN TO THE ORDER SCREEN AND RUN A TEST TRANSACTION TO CONFIRM YOUR SETTINGS ARE CORRECT.
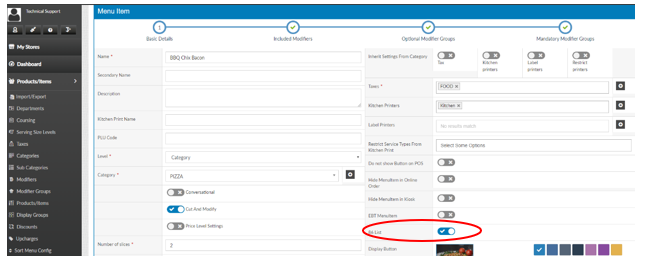
How to Add an Item to the 86 List:
Select “Products/Items”, “Products/Items” and then enable “86 List”
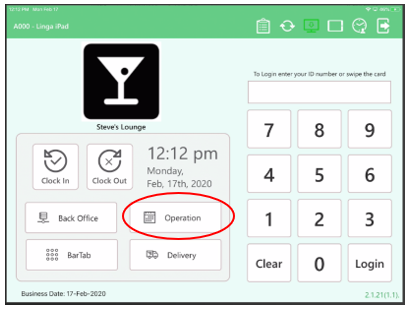
Select “Operation”
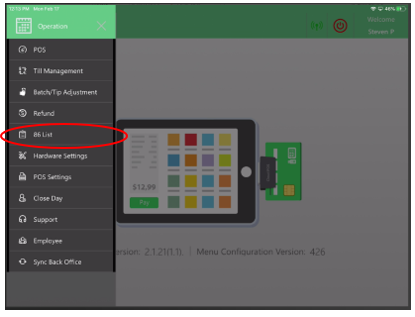
Select “86 List”
Edit the amount of orders that are left to serve
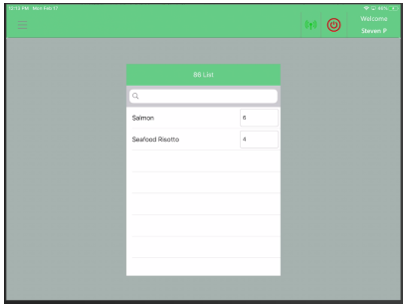
Viewing the item of the 86 List:
The item will indicate how many orders are left
Viewing what is on the 86 List:
Select the “Clipboard”
This will show you what items are on the 86 list
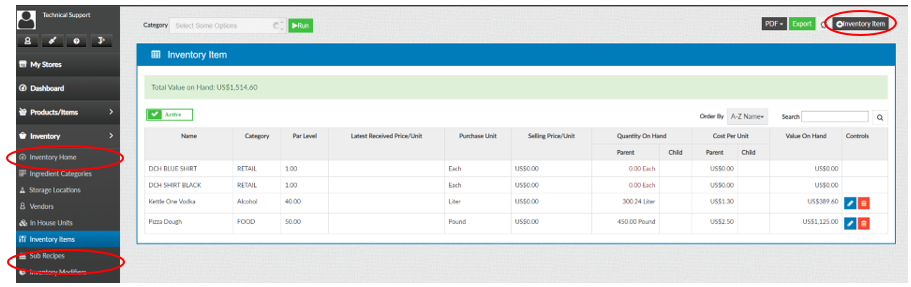
“Inventory”, “Inventory Items”, “+Inventory Item”
Note: When setting up an inventory item, you must have Ingredient Categories, Storage Locations, Vendors, and In House Units created
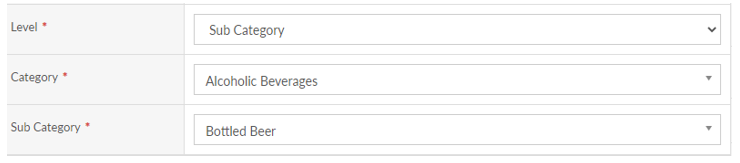
Select a Category for the item
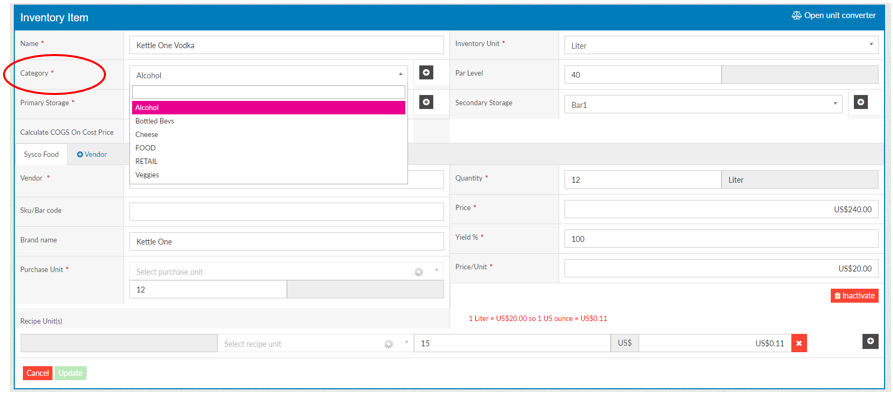
Select a Primary Storage location for the item
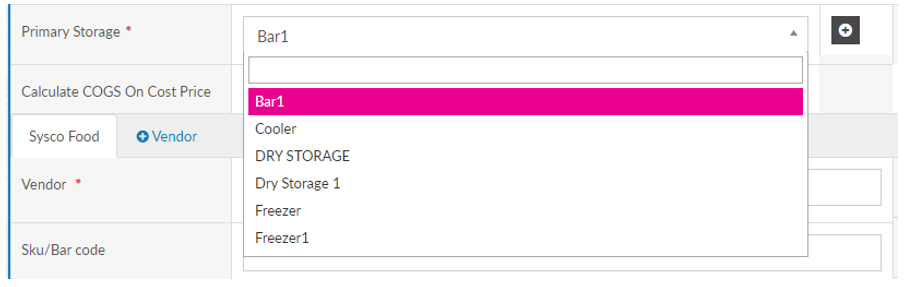
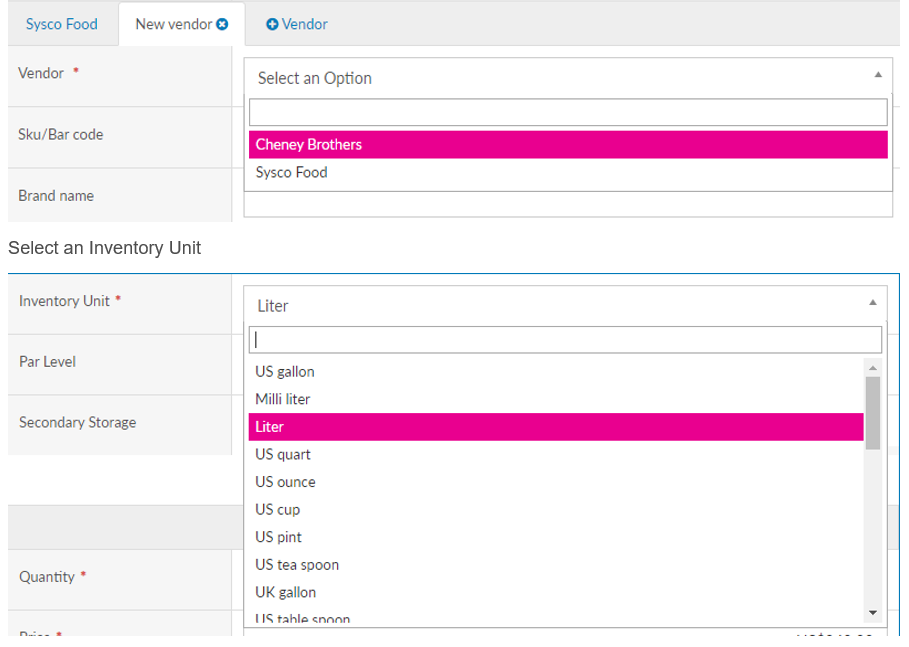
Select a Vendor
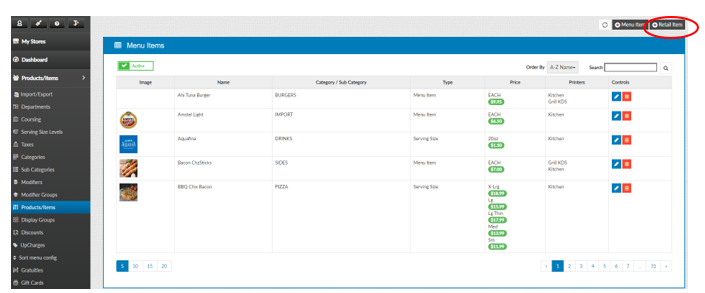
Select “Retail Item” in the Products and Items tab
Fill in all the required information about the item

Insert the Item Name

Insert the Level of the Item
Fill in the Sku Code

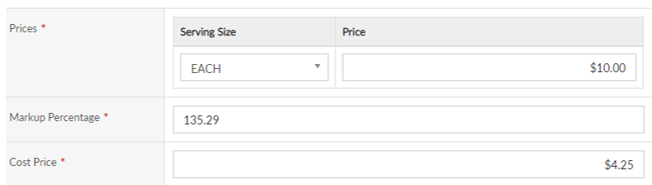
Fill out the Price/Cost for Item
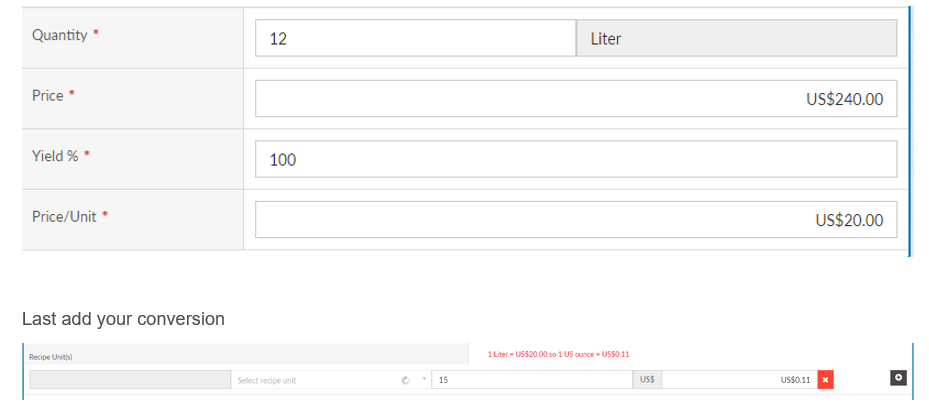
Next fill out the Inventory Details page and once complete you can Save and Publish the retail item
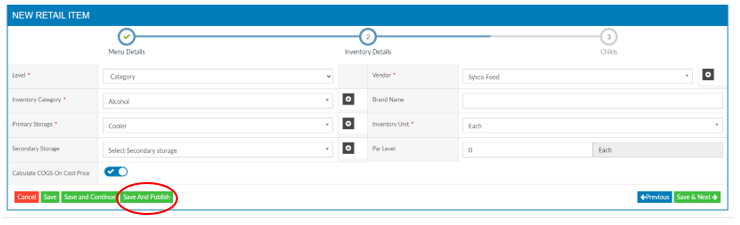
Fill out the Level of Inventory to store the item

Select a Storage Location
![]()
Select a Vendor

Select the Inventory Unit

To locate the IP Address for printer:
On the back of the printer you will need to hold down the reset button (using a paper clip) until the “Dynamic Status Sheet” prints
As Shown: Dynamic Status Sheet, this will show the IP Address
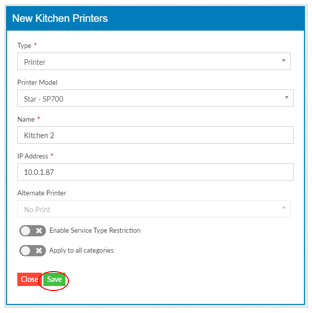
Adding a Kitchen Printer:
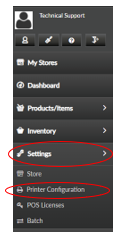
Select “Settings”, “Printer Configuration”
Go to “Kitchen Printers” then select “+Kitchen Printer” (if adding a new printer)
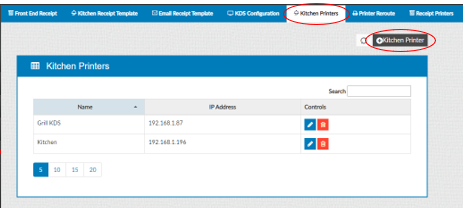
Edit the information and select “Update” when complete
Click “+ Floor” to add a new floor.
![]()
Name the floor, the order sequence of the floor, and the size/background color.

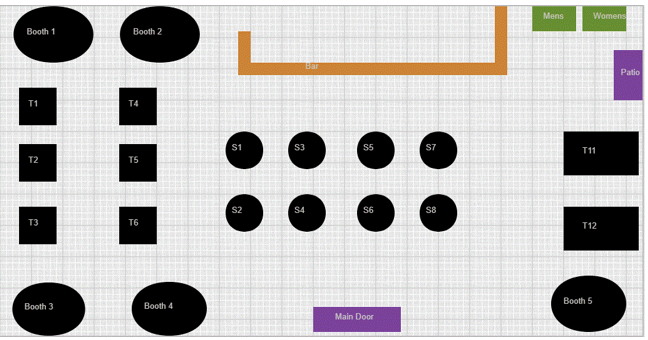
Select the first table, there are three shapes:

After clicking the table, it will appear on your chart:

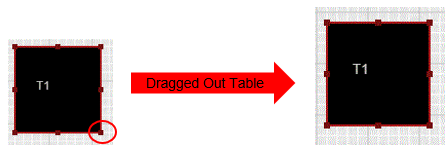
You can move the table by clicking and dragging:
To edit a Table name, click the table, and then click edit table button:

Name the table, change the shape, and add the number of seats:

Delete a table by clicking the table and then the trash can icon:

Change the settings for the tables by clicking “Table Settings”:
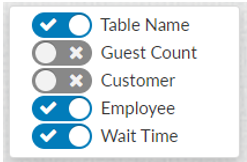
Edit Mode:
You can preview how it will look on your iPad by clicking the preview button:

Preview Mode:
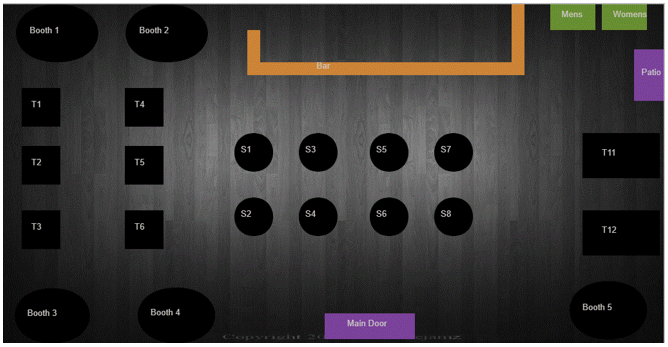
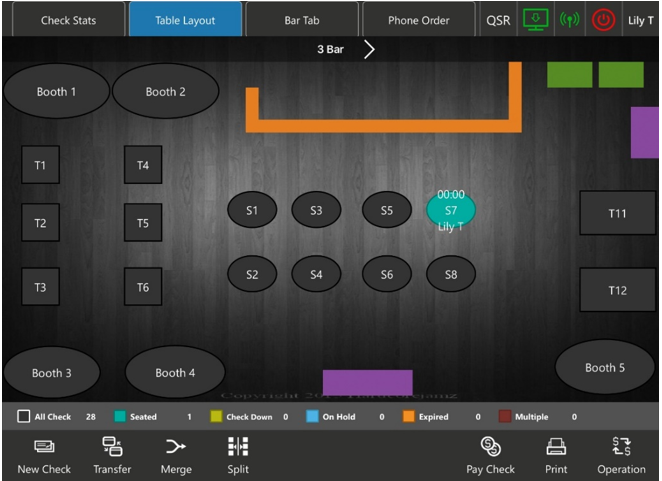
Front of House Result:
How to set up different types of discounts on the Back of the House:
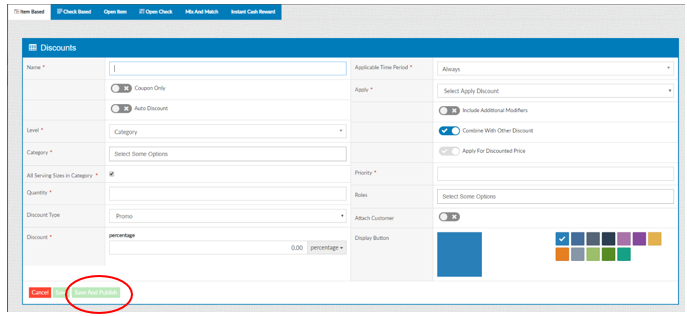
Item Based Discount:
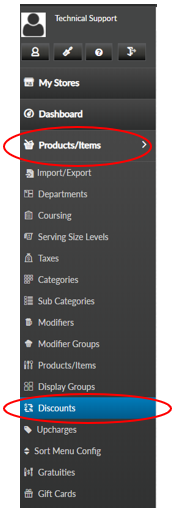
Select “Products/Items” then “Discounts”
The “Item Based” discount will appear. Select “+Discount”
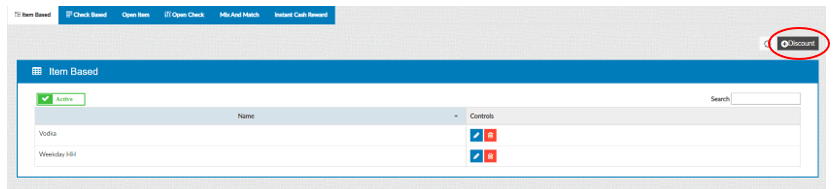
You will be able to customize the discount here. When finished press “Save and Publish”
NOTE: This discount is added to only the Category you select
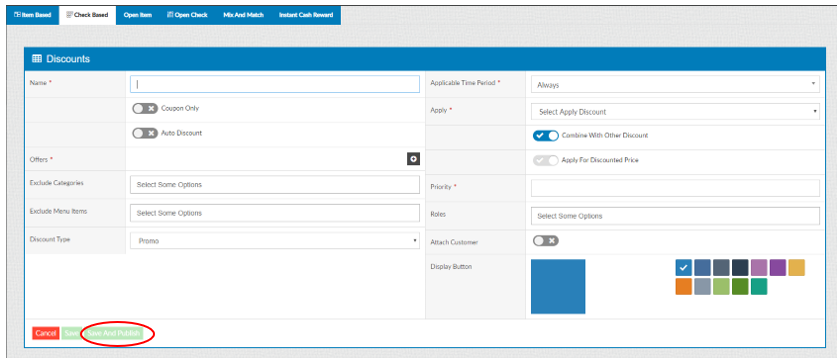
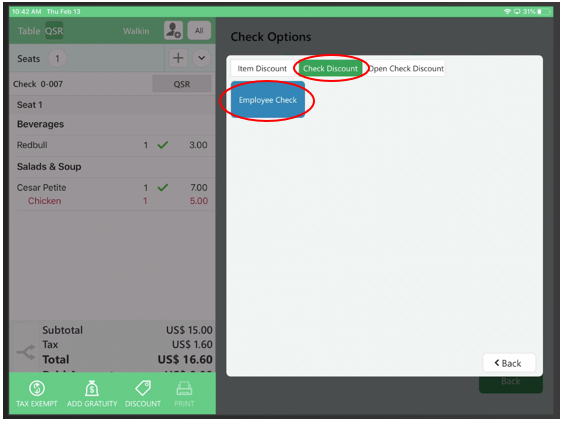
Check Based Discount:
Select “Check Based” then “+Discount”.

You will now be able to customize the discount. When finished select “Save and Publish”
NOTE: This will discount everything on the check if selected
How to Create Open Discounts:
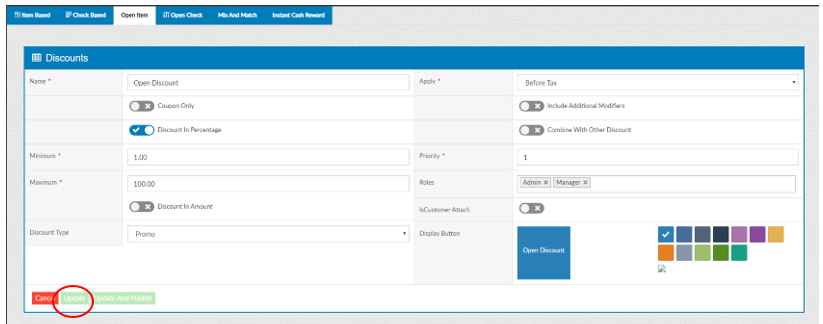
“Open Item” Discount:
Select “Open Item” discount and customize the discount, then “Update” when finished
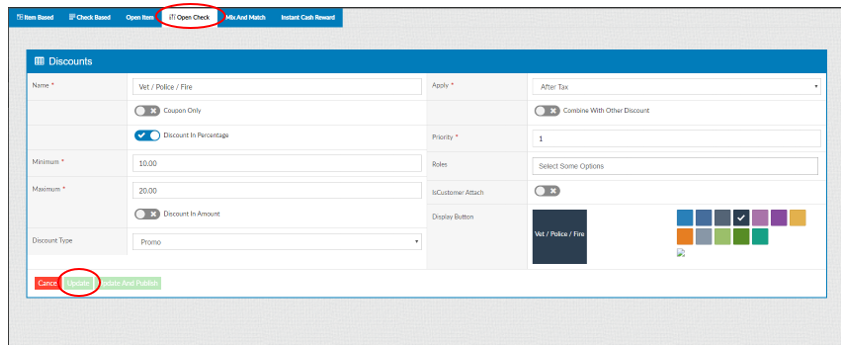
“Open Check” Discount:
Select “Open Check” and customize discount. When finished “Update”
Mix and Match Discount:
Select “Mix and Match” and select “+Discount”
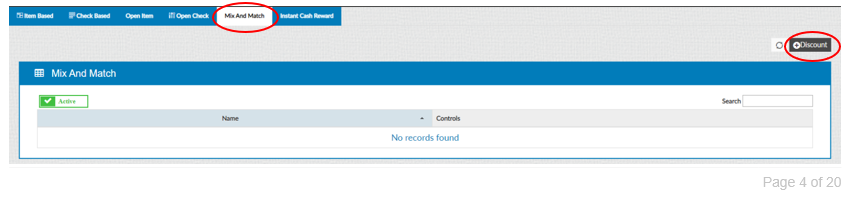
Add the discount and select “Save and Publish”

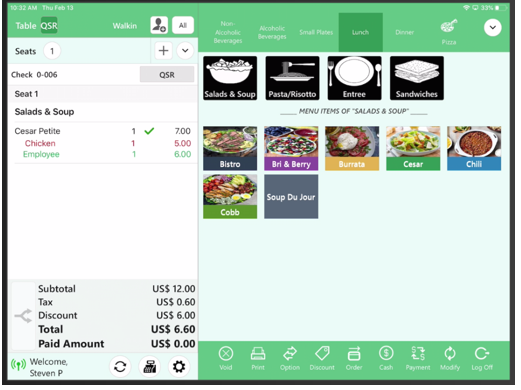
How to use the Discounts on Front of House:
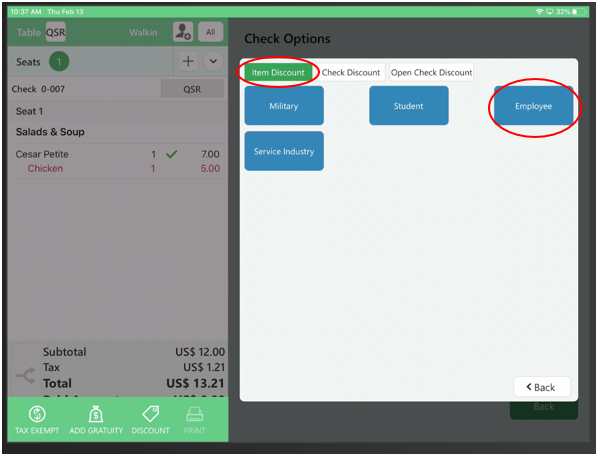
How to use Item Discount via check discount button:
Select “Discount”
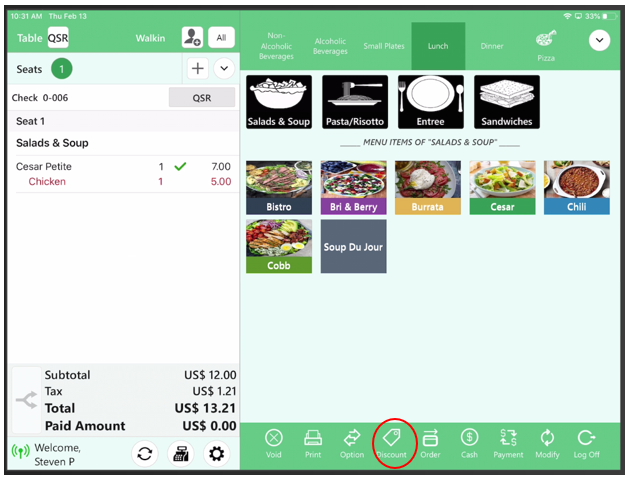
Select the discount of your choice

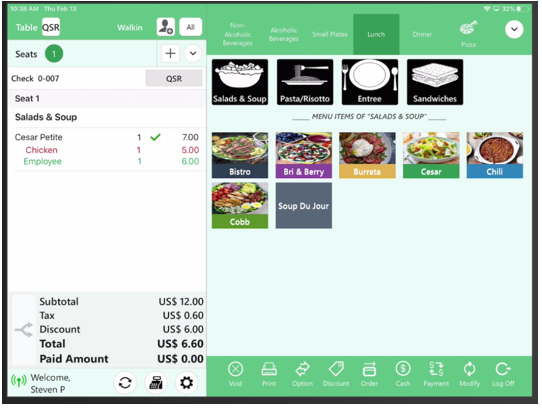
The item based discount is now applied to the item
How add Item Based Discount on “Menu Option” screen:
Select the “seat number” and then “select the item” and then select “Discount”
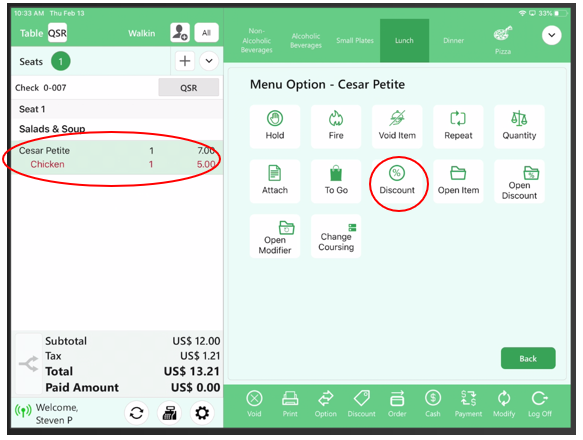
Select the discount of your choice
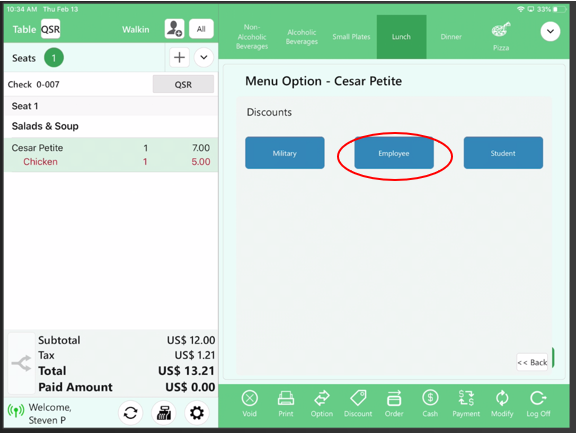
Discount is now applied to that SPECIFIC item

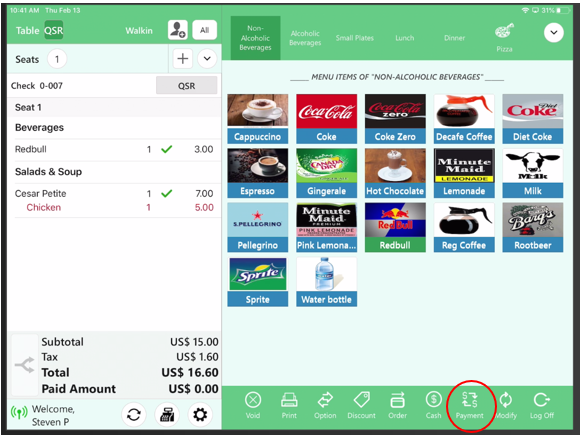
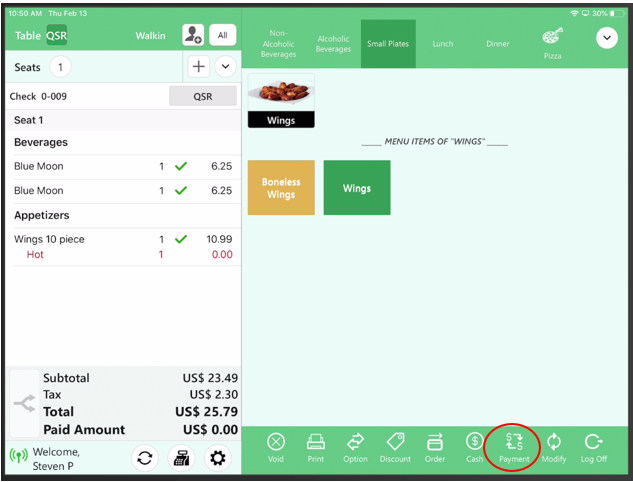
How to apply discount via “Payment” screen:
Select “Payment”
Select “Discount”
Select “Item Discount” then Select the discount of your choice
Discount is now applied to that specific item
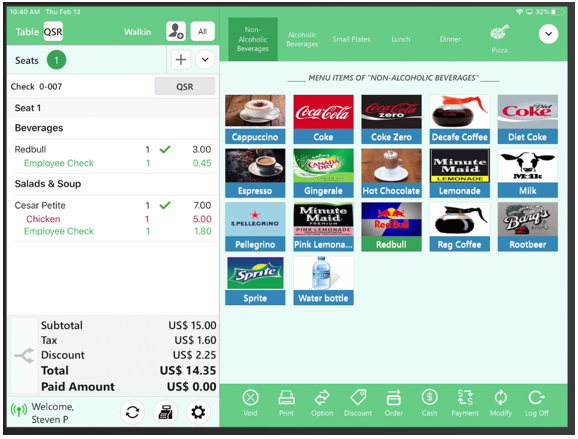
How to use Check Based discount:
Select “Discount”
Select the discount of your choice
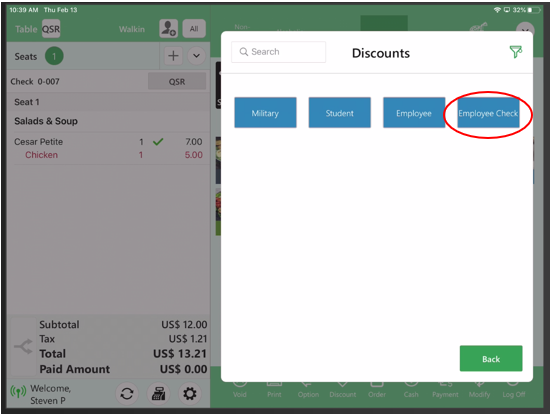
Discount has now been applied to the ENTIRE check
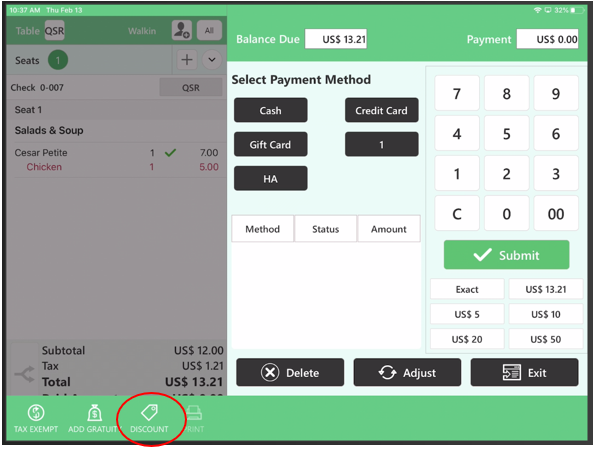
How to add a Check Based discount via the payment screen:
Select “Payment”
Select “Discount”
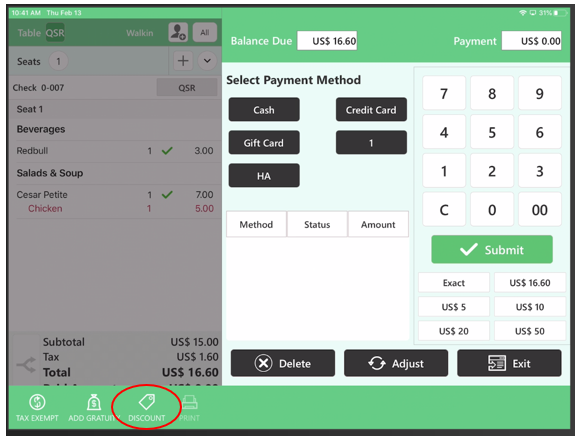
Select “Check Discount” and select the discount of your choice
Discount has been applied to the ENTIRE check
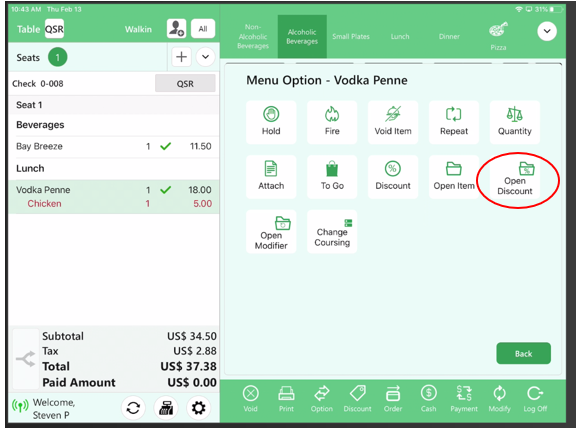
How to use “Open Item” discount:
Select the “seat number” and then “select the item”
Select “Open Discount”
Select Amount or percent, then type in the amount of your choosing and select “Apply”
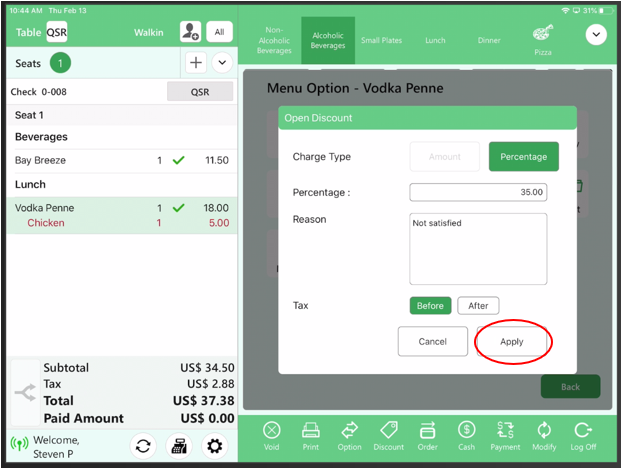
Discount has been successfully applied to that SPECIFIC item
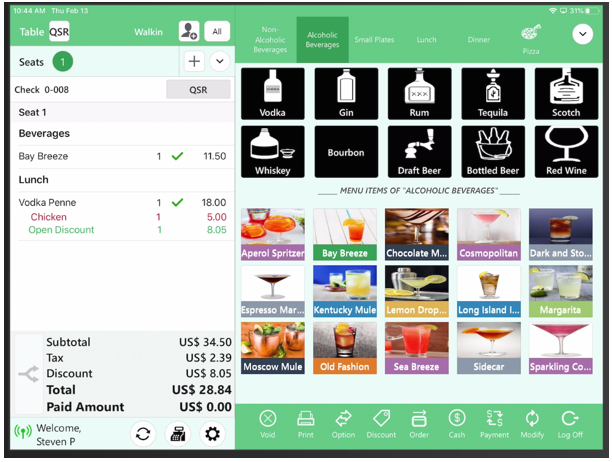
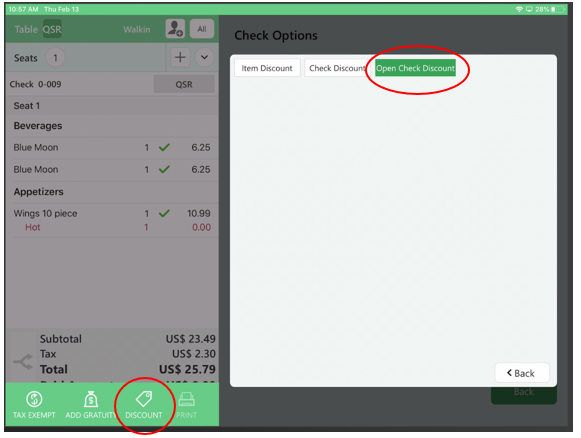
How to use “Open Check” Discount:
Select “Option”
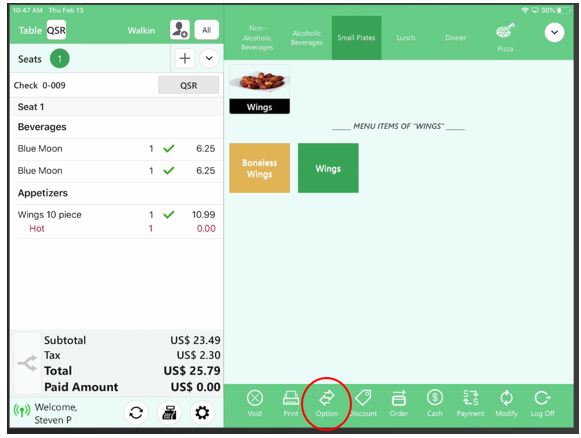
Select “Discount”
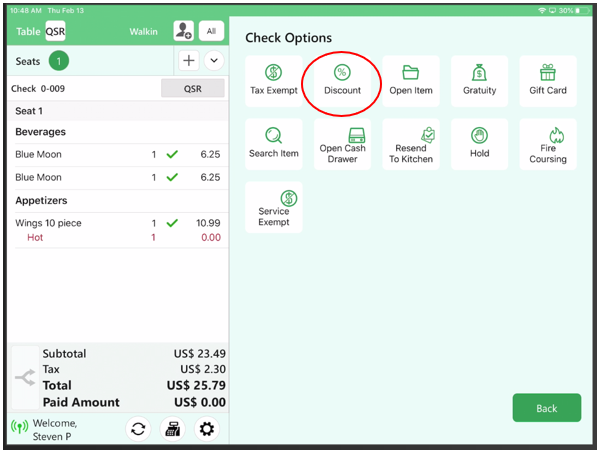
Select “Open Check Discount”
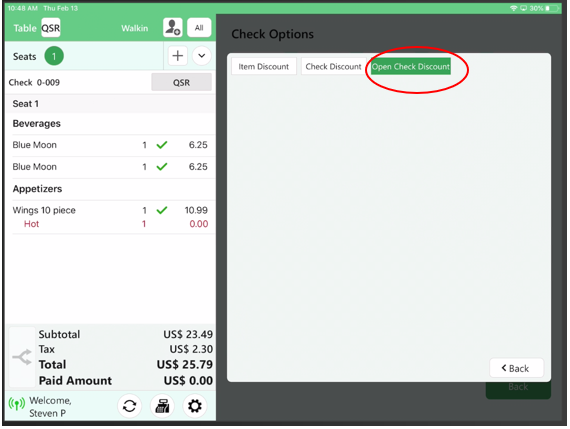
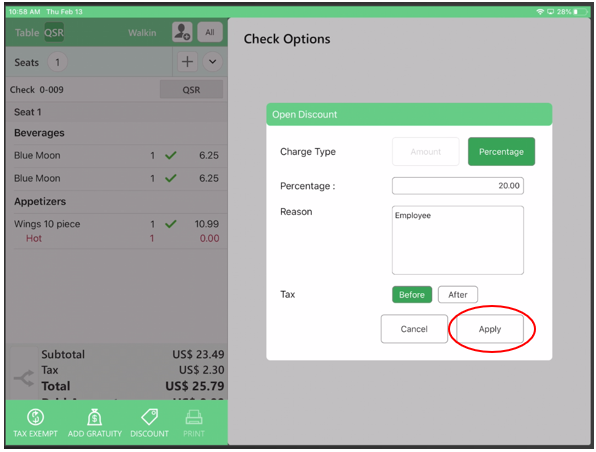
Select Amount or percent, then type in the amount of your choosing and select “Apply”

Discount has been successfully applied to the ENTIRE check
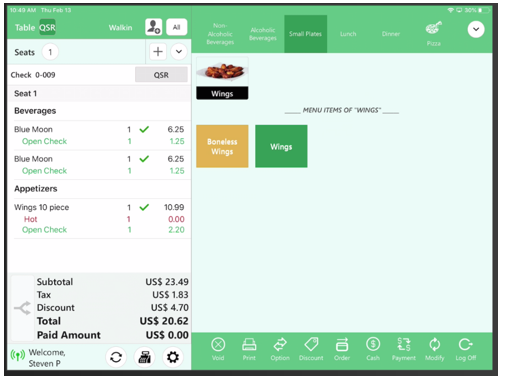
How to add a “Open Check” discount via the payment screen:
Select “Payment”
Select “Discount” Select “Open Check Discount”
Select Amount or percent, then type in the amount of your choosing and select “Apply”
Discount has been successfully applied to the ENTIRE check

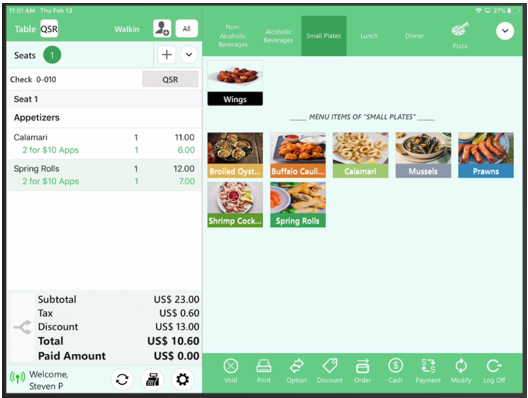
Example of “Mix and Match” on the FOH:
A customer comes in for the 2 for $10 appetizer promotion that is going on. You select what two apps the customer wants, and the discount will automatically apply
NOTE: THESE DISCOUNTS ONLY APPLY AUTOMATICALLY IF “AUTO DISCOUNT” IS ENABLED
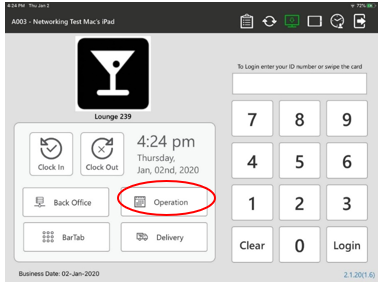
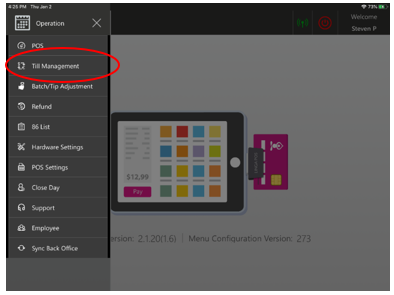
How to Start the Till:
Log in with ID number and select “Operation”
Select “Till Management”
Select “Set Till”
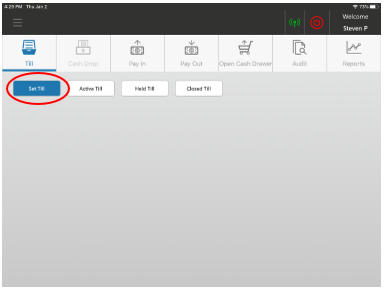
Insert the amount of money you would like in the Till and press “Continue”
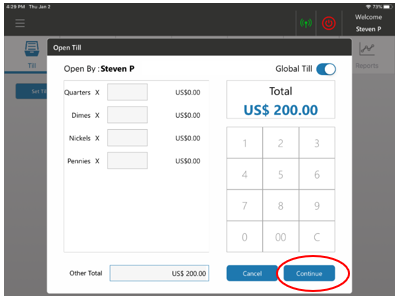
Screen shows Till that is Active
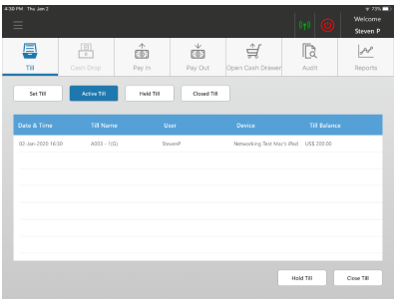
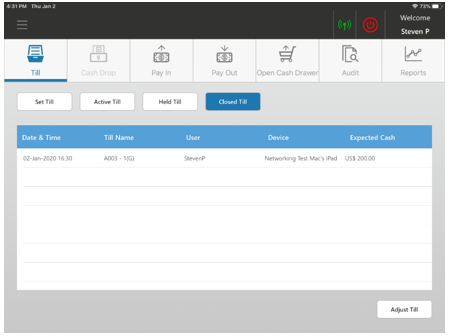
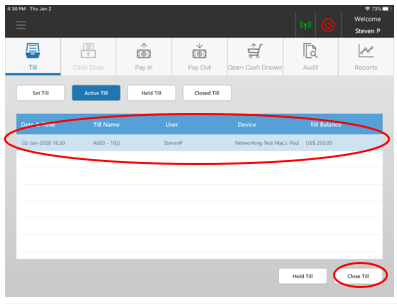
How to Close a Till:
Select the Till that is currently open
Select “Close Till”
Insert the “Cash Expected” and press “Continue”

Select “Submit”
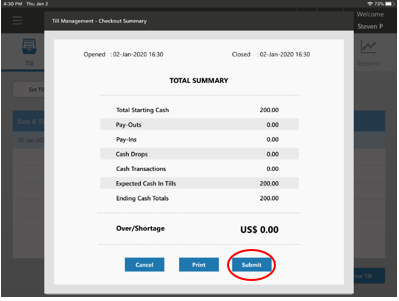
After pressing “Submit” it will now be a “Closed Till”