Adding a Receipt Printer
Adding a Receipt Printer to the Back Office:
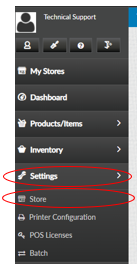
Select “Settings”, “Printer Configuration”
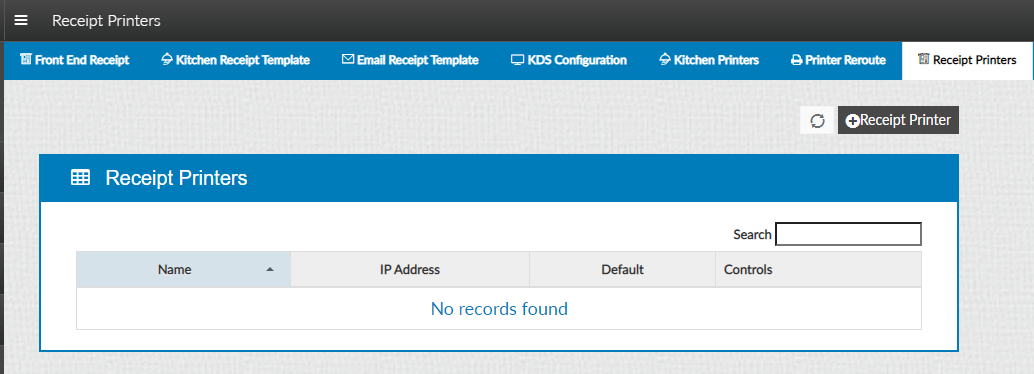
Click “Receipt Printers then select “+Receipt Printer”
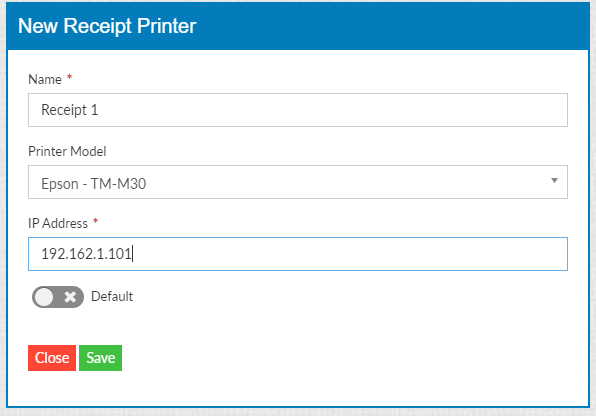
Type in the IP address from the ticket and press “Update”
Adding a Receipt Printer to the Back Office:
Select “Settings”, “Printer Configuration”
Click “Receipt Printers then select “+Receipt Printer”
Type in the IP address from the ticket and press “Update”