How to Create a New Item:
Select “Products/Items”, “Products/Items” and then select “+Menu Item”
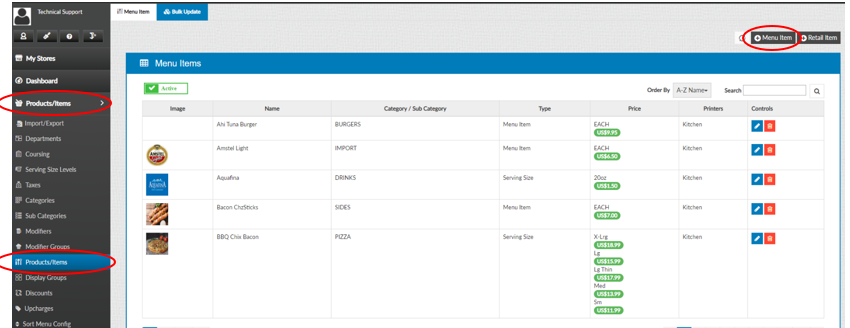
Note: Before creating an Item, you must have all the fields created before attaching
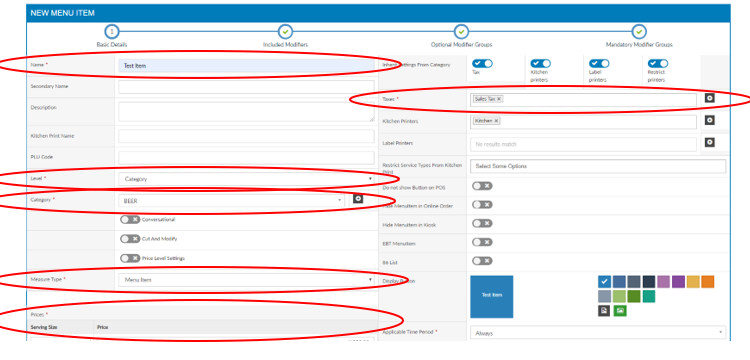
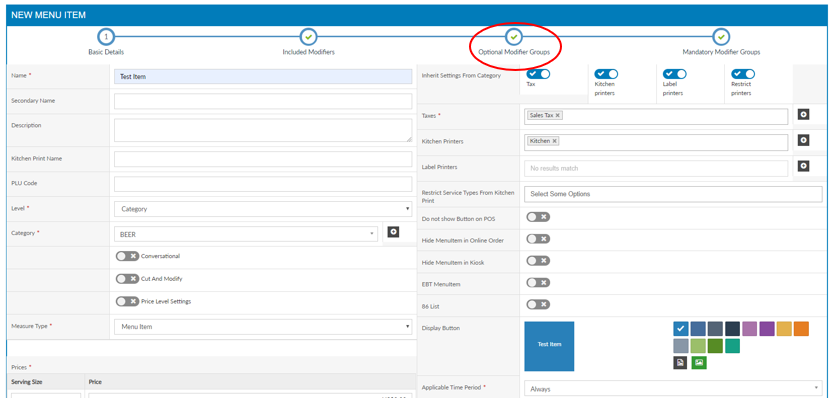
The following information must be filled out:
– Name
– Level
– Category or Sub Category
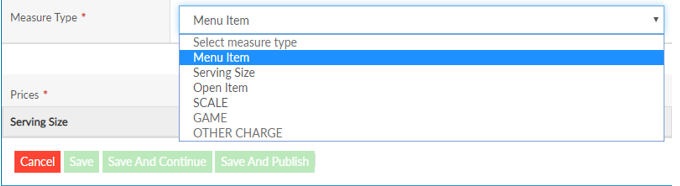
– Measure Type
– Item Price (Each or by Serving Size)
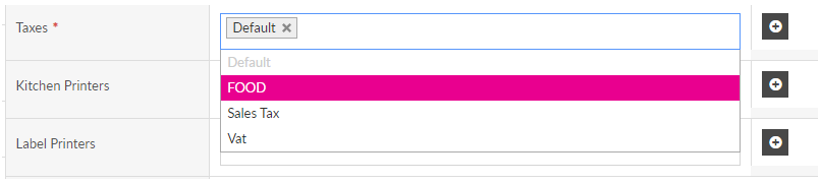
– Tax (If Applicable)
– Printers (If Applicable)
– When finished select “Save”
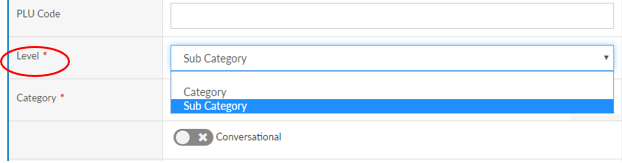
Adding a Level:
Select the Item Level from the drop down that the item will be associated with
Adding Category:
Select the Category from the drop down that the item will be associated with
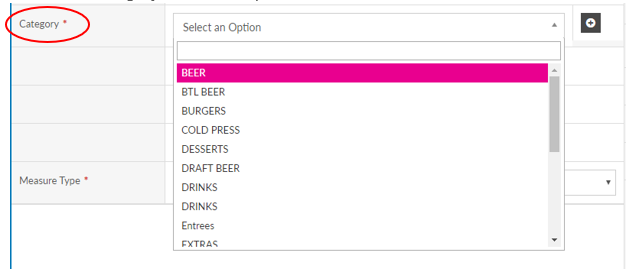
Adding Sub Category:
Select the Sub Category that will associate to the Category for the Item

Adding Measure Type:
Select the Measure type that you would like the item to be associated with
– Each: The Item will ring in as one price when selected
– Serving Size: The item will have different sizes to select from, each will have its own pricing
– Open Item: The Item will prompt and ask for the pricing when selected
Adding Tax:
Select the Taxes that will be associated with the item
Changing Color of Display Button:
Select the default colors or select the color wheel

Uploading an Image for Display Button:
Select the “Insert Image from disk” or “Select Image from gallery”
NOTE: Recommended Dimensions for Menu Images is 108 by 78, and must be no more than 100 KB

Attaching Modifiers to Items:
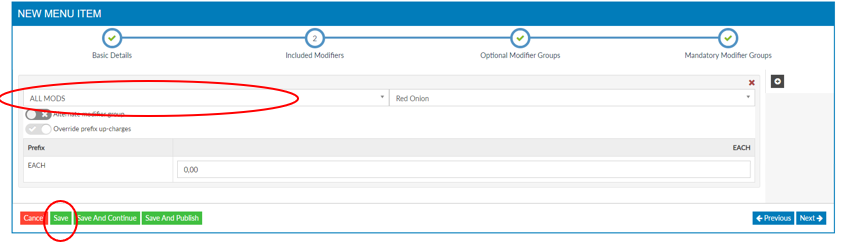
Adding Included Modifiers:
Select “Included Modifiers”
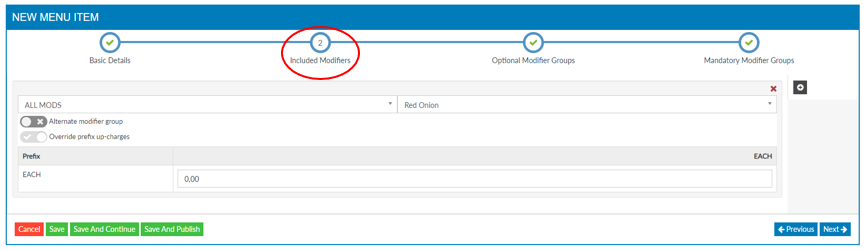
Select “+” add what modifier group you want to attach and select “Save”
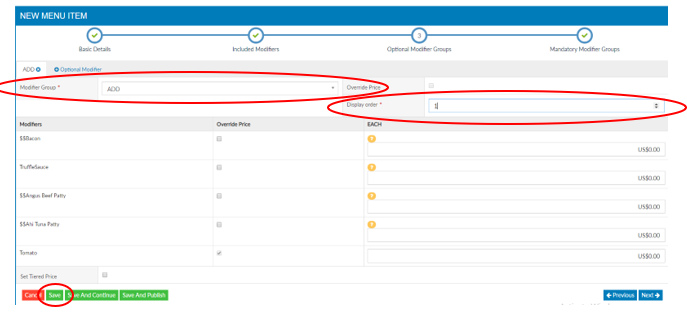
How to Add Optional Modifier Groups:
Select “Optional Modifier Groups”
Select “+Optional Modifier”

Select the “Modifier Group” then “Display Order” then when finished select “Save”
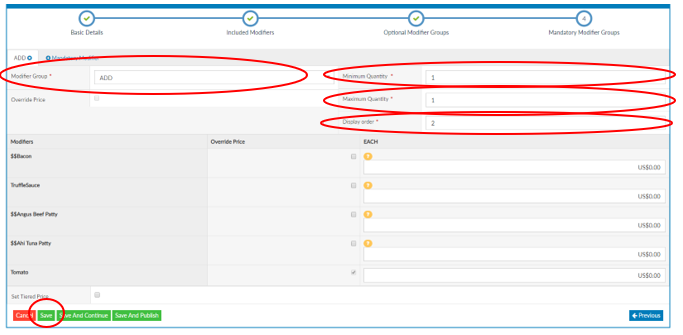
Adding Mandatory Modifier Groups:
Select “Mandatory Modifier Group”

Select “+Mandatory Modifier”

Select the “Modifier Group”, “Minimum Quantity”, “Maximum Quantity”, “Display order”
When finished click “Save”