Splitting Ticket-Split Check
- After selecting the ticket to split check. Select the grey/black split arrow button, located in the lower left area of the screen next to ‘Total’ & ‘Paid Amount’.
- Select ‘SPLIT CHECK’ DO NOT select ‘SPLIT BY SEAT’
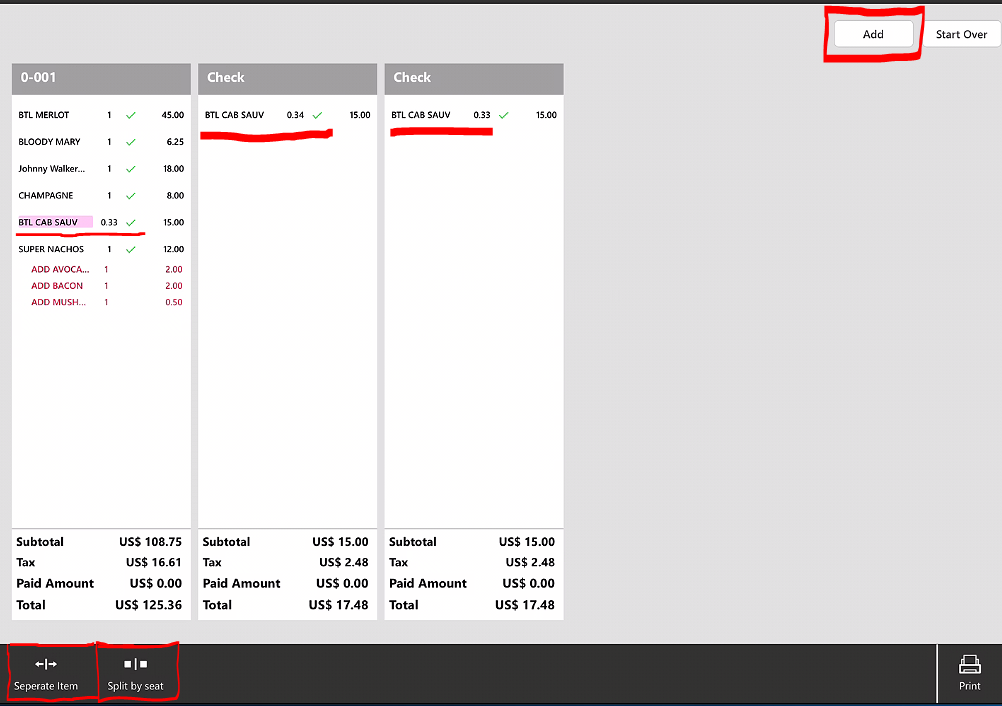
- Select ‘Add’ in upper right area of screen to create however many ways you want to split the check. This example we will do 4. ‘Split by seat’ will also add a ‘Check’ column, but only once.
- If you need to separate items from the main check onto a different check for someone to pay separately, then you will select ‘Split by seat’, located in the lower left area of the screen. This will create a new column labeled ‘Check’, to where you will move the items you wish to have paid out separately.
- Select the item(s) you wish to move over. ‘SEPARATE ITEM’ should only be used if you wish to split an item into however many ways you wish. To do this, select the item you wish to split, then select ‘Separate Item’, then select the number of times you wish it to be split. This will auto split the item in the column with number of times it is split. You can move these items to wherever they need to go for the split check.

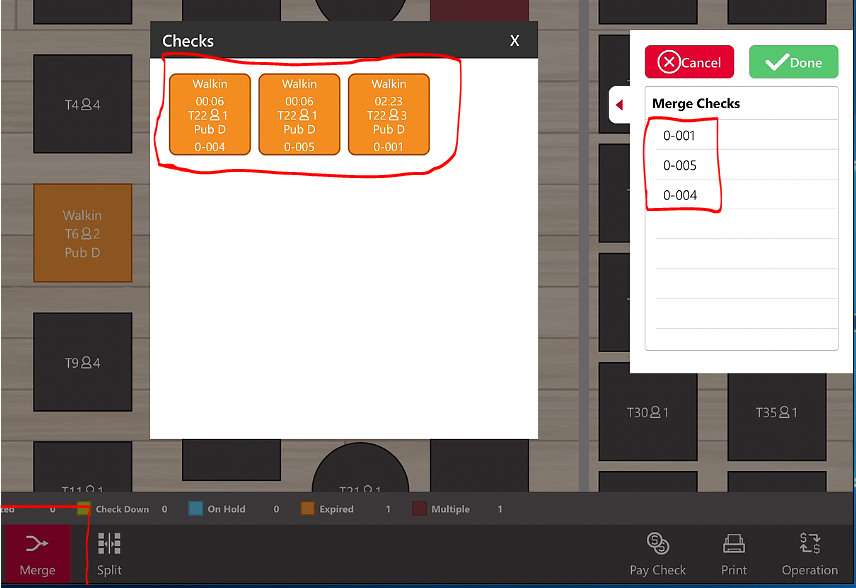
6. Select ‘Save & Close’. This will return you to the ordering screen. If you messed up or you need to put these back together, go back to the table layout screen. Select ‘Merge’ in the lower left area of the screen. Then select the table you had the separate checks on & select all the separate checks. This will auto populate the area on the right under ‘Merge Checks’, then hit done. This will put all the separate checks back together.

7. IF you did not mess up & need to close out the ticket(s), select the check that needs to close out & continue with the payment process.
