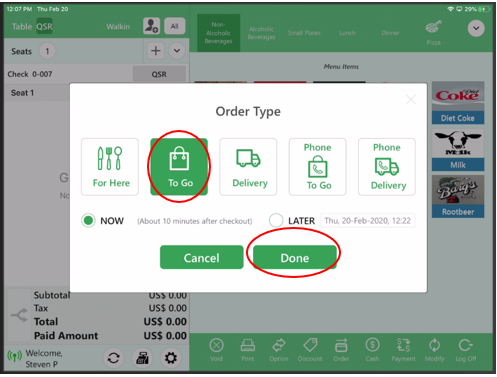
Ordering an Item To Go
Select “To Go” and “Done”
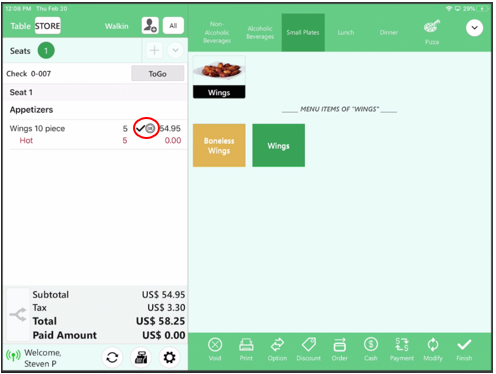
Select and item and will indicate the item is To Go
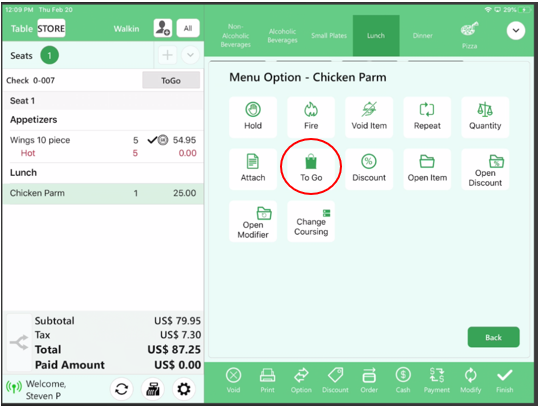
Alternative To Go:
Select another item and select “To Go” from the Menu Option screen
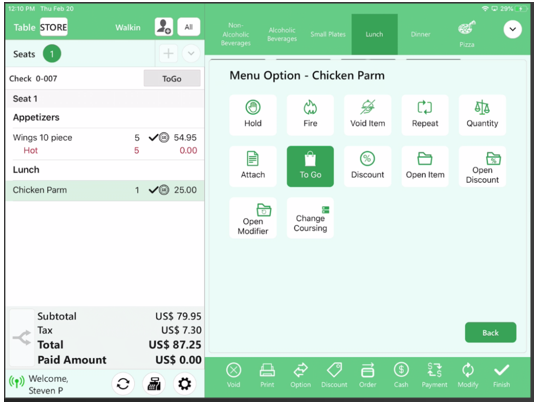
Now the item shows it is To Go
Select “To Go” and “Done”
Select and item and will indicate the item is To Go
Alternative To Go:
Select another item and select “To Go” from the Menu Option screen
Now the item shows it is To Go
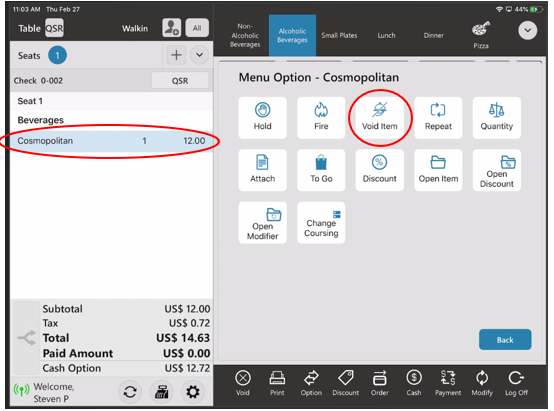
Voiding an Item via “Void Item” Button: (Not Sent to Kitchen)
Select the item name, and then select “Void Item” in the Menu Option screen
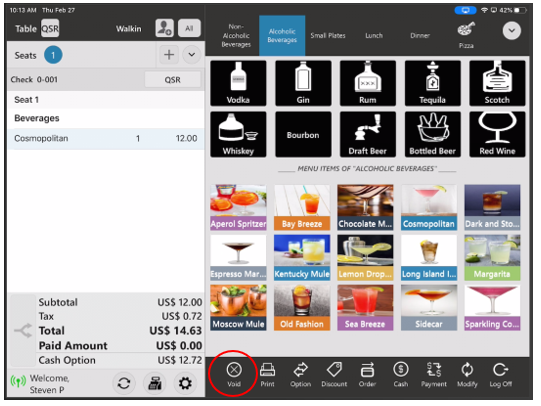
Voiding an Item via “Check Void” Button: (Not Sent to Kitchen)
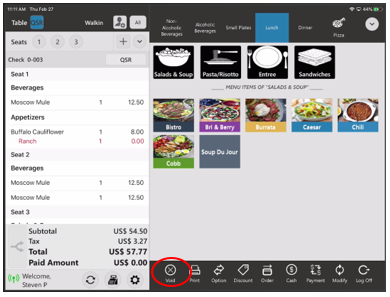
Select the item and select “Void” at the bottom of the screen
Note: This button will Voids ALL items
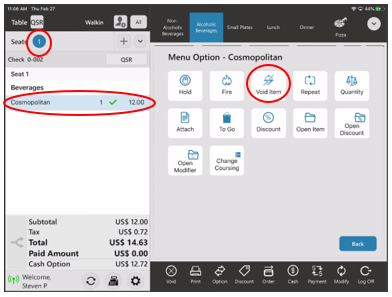
Voiding an Item via “Void Item” Button: (Sent to Kitchen)
Select the seat number, then select the menu item and finally select “Void Item” on the Menu Option screen
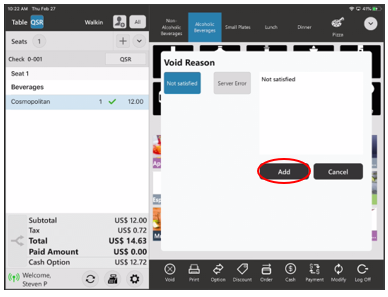
Select a void reason or type a reason in and select “Add”
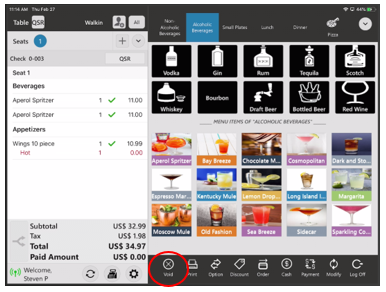
Voiding Item via “Void Check” Button: (Sent to Kitchen)
Select “Void”
Note: This button will Voids ALL items

Select a void reason or type a reason in and select “Add”

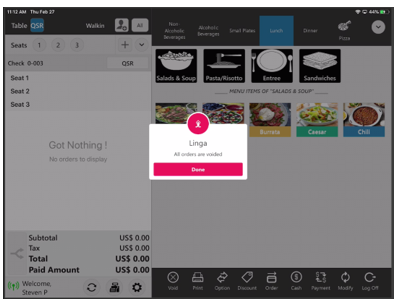
Voiding an ENTIRE check via “Void Check” Button: (Not Sent to Kitchen)
Select “Void”
Note: This button will Voids ALL items
All items are voided
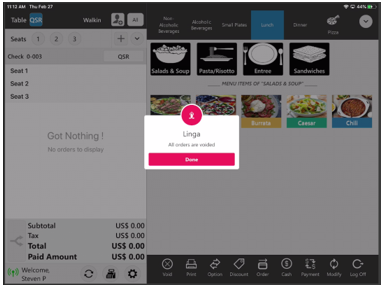
Voiding an ENTIRE check via “Check Void” Button: (Sent to Kitchen)
Select “Void”
Note: This button will Voids ALL items
Select a void reason or type a reason in and select “Add”

All items are voided
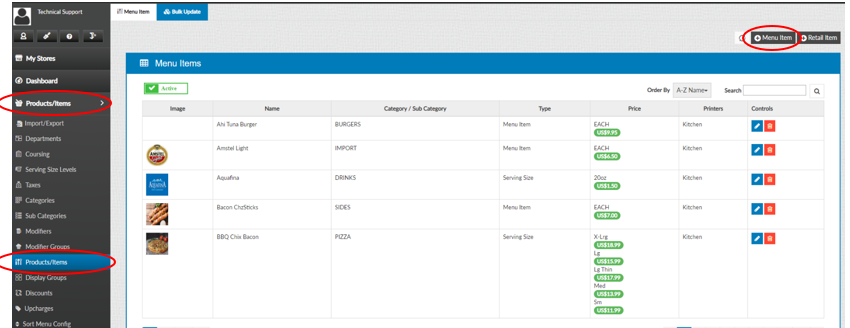
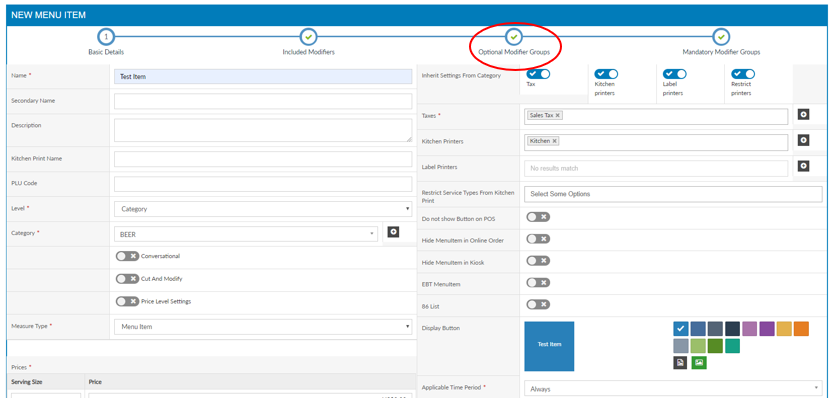
How to Create a New Item:
Select “Products/Items”, “Products/Items” and then select “+Menu Item”
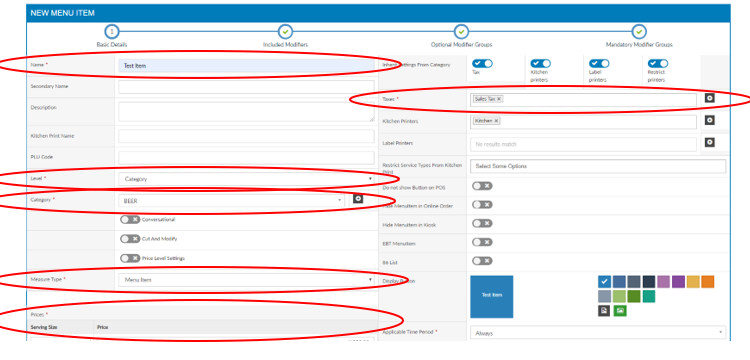
Note: Before creating an Item, you must have all the fields created before attaching
The following information must be filled out:
– Name
– Level
– Category or Sub Category
– Measure Type
– Item Price (Each or by Serving Size)
– Tax (If Applicable)
– Printers (If Applicable)
– When finished select “Save”
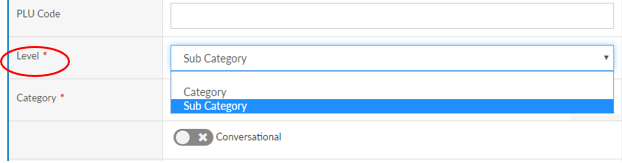
Adding a Level:
Select the Item Level from the drop down that the item will be associated with
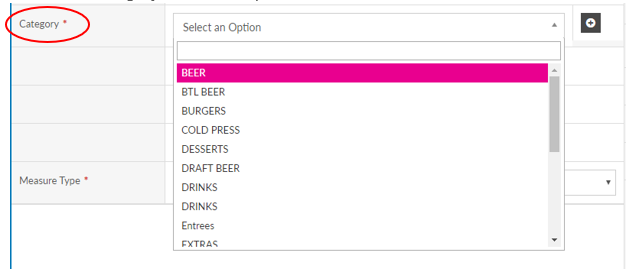
Adding Category:
Select the Category from the drop down that the item will be associated with
Adding Sub Category:
Select the Sub Category that will associate to the Category for the Item

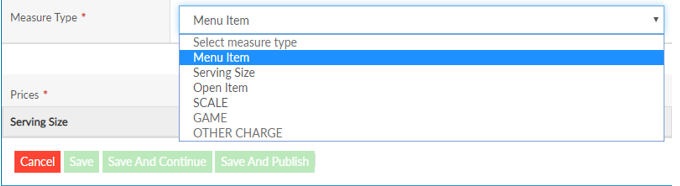
Adding Measure Type:
Select the Measure type that you would like the item to be associated with
– Each: The Item will ring in as one price when selected
– Serving Size: The item will have different sizes to select from, each will have its own pricing
– Open Item: The Item will prompt and ask for the pricing when selected
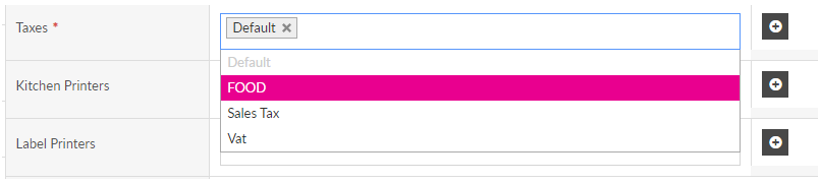
Adding Tax:
Select the Taxes that will be associated with the item
Changing Color of Display Button:
Select the default colors or select the color wheel

Uploading an Image for Display Button:
Select the “Insert Image from disk” or “Select Image from gallery”
NOTE: Recommended Dimensions for Menu Images is 108 by 78, and must be no more than 100 KB

Attaching Modifiers to Items:
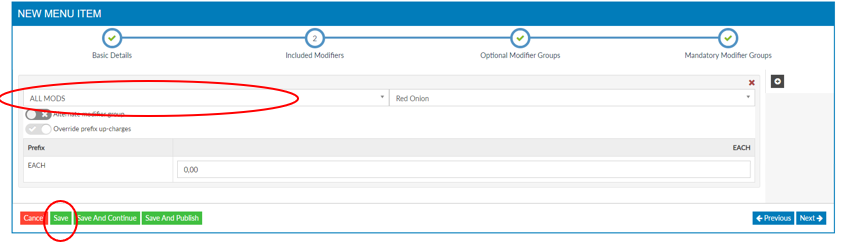
Adding Included Modifiers:
Select “Included Modifiers”
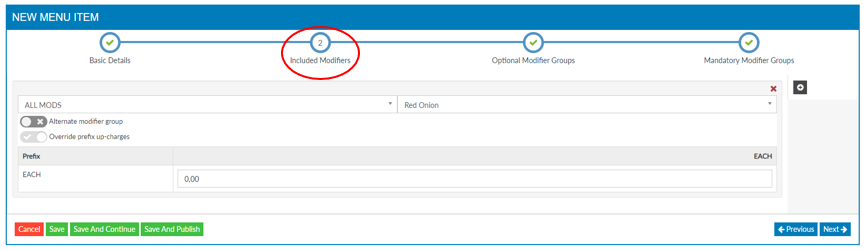
Select “+” add what modifier group you want to attach and select “Save”
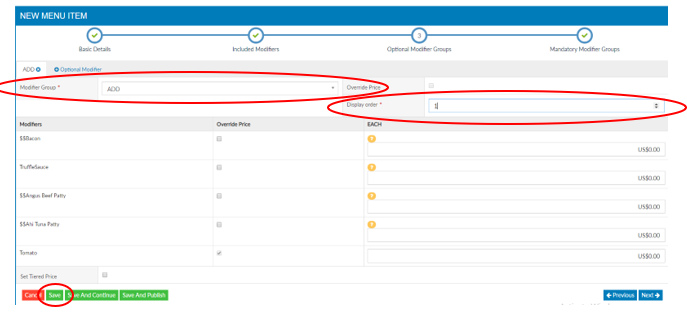
How to Add Optional Modifier Groups:
Select “Optional Modifier Groups”
Select “+Optional Modifier”

Select the “Modifier Group” then “Display Order” then when finished select “Save”
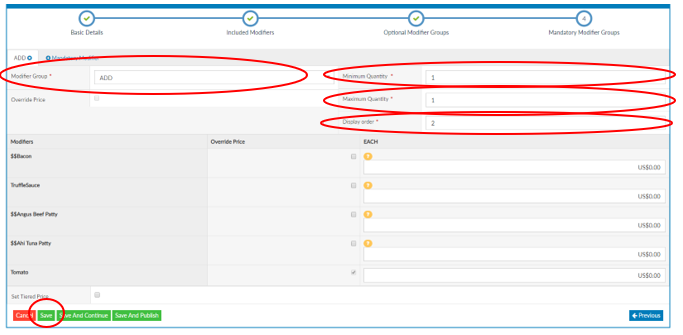
Adding Mandatory Modifier Groups:
Select “Mandatory Modifier Group”

Select “+Mandatory Modifier”

Select the “Modifier Group”, “Minimum Quantity”, “Maximum Quantity”, “Display order”
When finished click “Save”
How to find the IP Address:
Log into the PAX Terminal (Hold Function + 1 to open the menu, enter the PW)
Navigate to communication
Click LAN Parameters
Click IP Address
Set the IP Address by typing it into the system (Example Below)
How to set the IP Address to Static:
Log into the PAX Terminal (Hold Function + 1 to open the menu, enter the PW)
Navigate to communication
Click LAN Parameters
Click IP Address
Set the IP Address by typing it into the system (Example Below)
After you set the IP Address click the back button and then select
Now click LAN Type
Select STATIC from the options menu
Now back out all the way to the main screen