On this page
- Introduction
- 1.1 Mandatory Fields
- 1.2 Options
- 1.4 Selecting and Adding a New KDS Device to Display Items Under a Subcategory
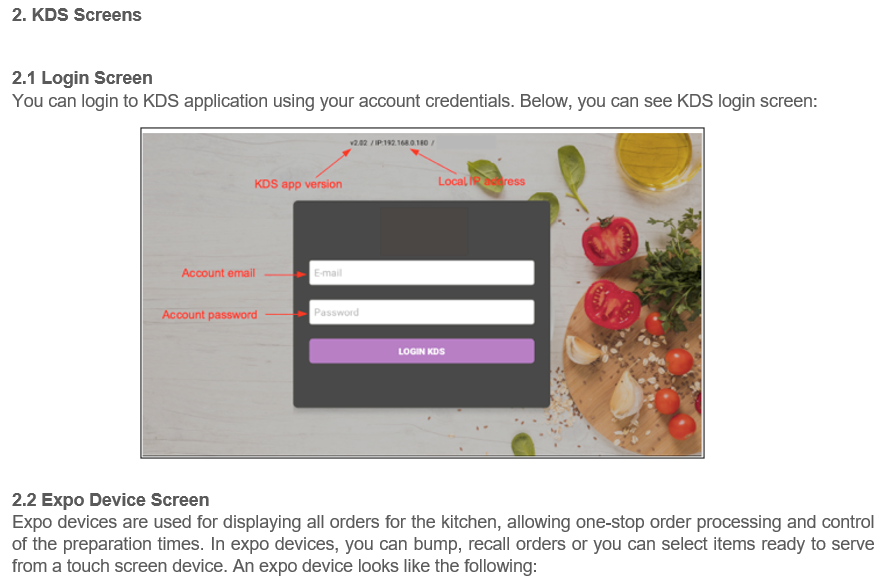
Introduction
Kitchen Display System (KDS) is a digital screen connected to the POS system, routing items to the appropriate kitchen station to reduce serving time and to improve food quality. Designed to be working on touch screen devices, KDS helps its users to manage their serving processes in an easy and reliable way. This document covers and describes key functionalities of the KDS application.
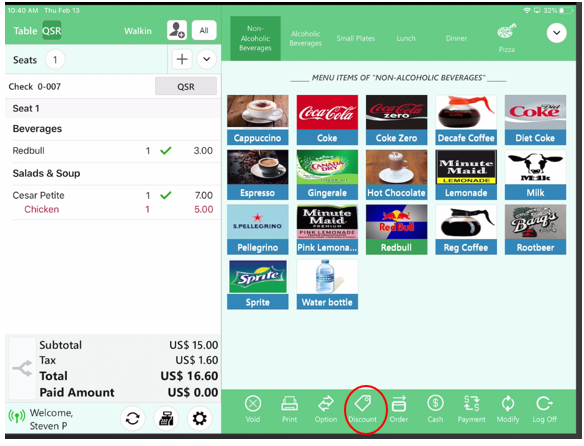
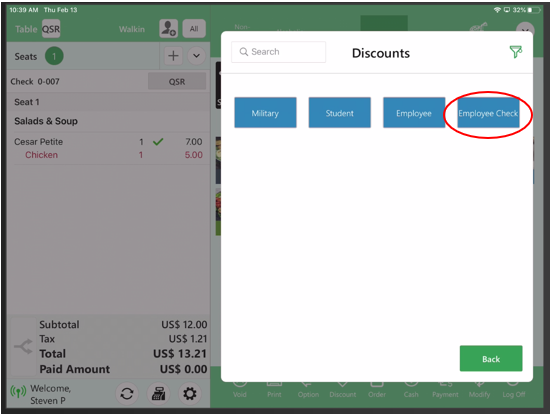
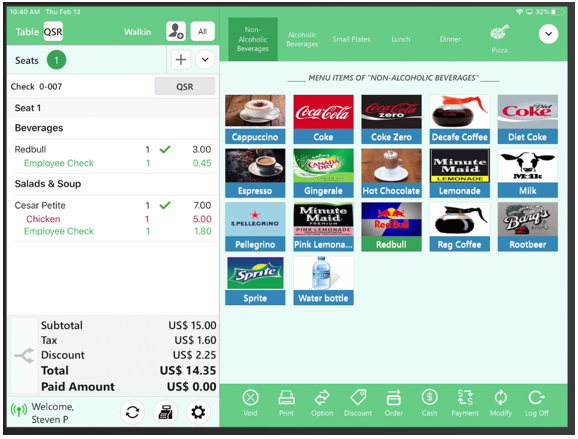
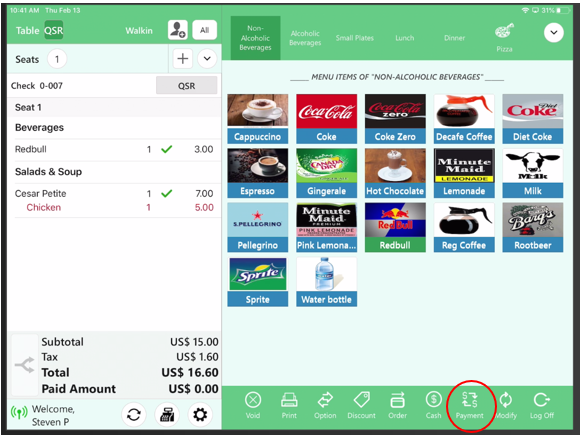
1.Defining a New Device for Kitchen Display System Usage
In order to use a device in Kitchen Display System, a device must be first defined in the back office as follows:
Login to back office with your account credentials.
In ‘My Stores’ page, select the store for which you want to add a KDS device.
On the left menu, click ‘Settings’ and then click ‘Printer Configuration’.
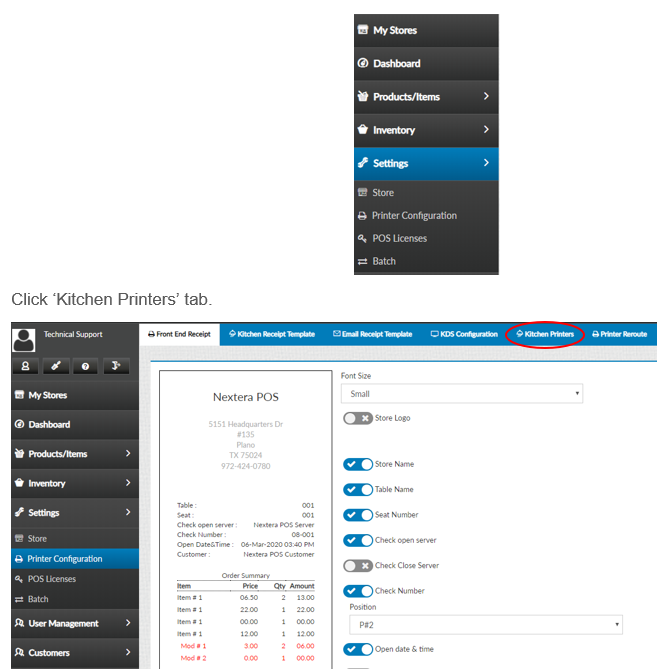
Click ‘Kitchen Printer’ button
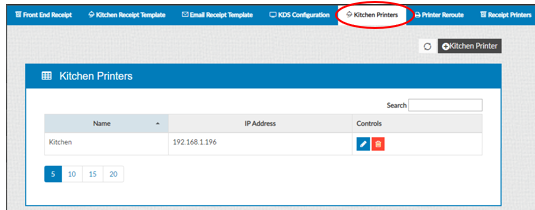
In this screen, you can see mandatory and optional fields to define your device.
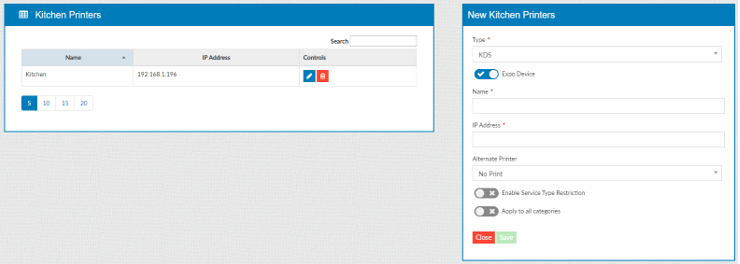
1.1 Mandatory Fields
Type: Type of the kitchen printer (printer / KDS). You should select ‘KDS’ option.
Name: Name of the KDS device. (e.g. KDS_Expo, GrillKDS, Desserts…)
IP Address: Local IP of the KDS device.
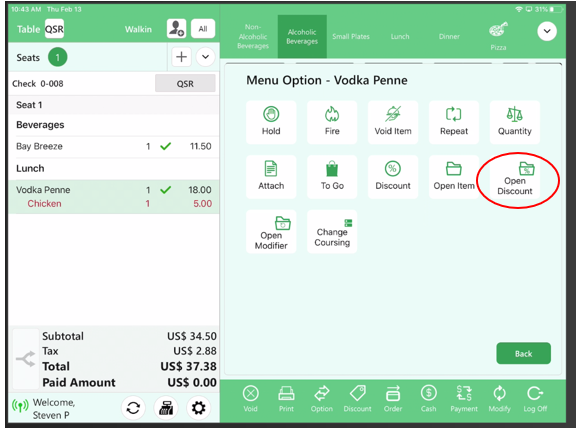
1.2 Options
Expo Device: Enable if the device is to be an ‘Expo’ device.
Expo Printer IP Address: Local IP address of printer connected to expo device. Expo printers prints order summaries if needed.
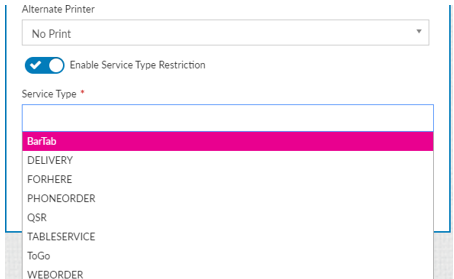
Enable Service Type Restriction: Enable and select the service types restricted for the KDS device.
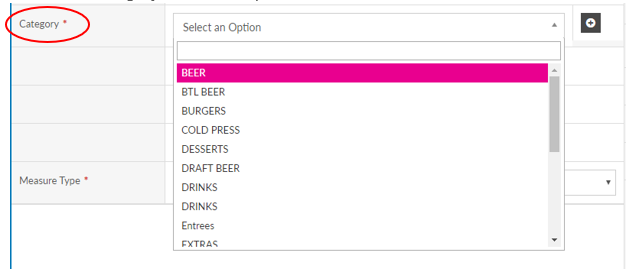
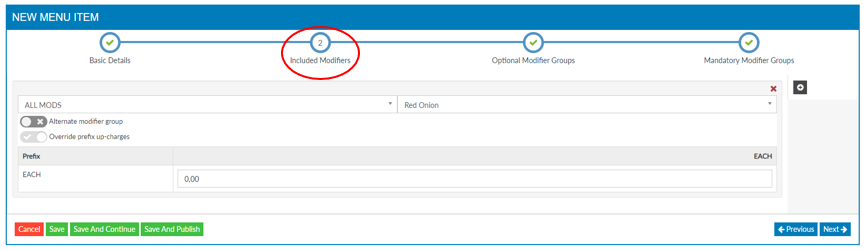
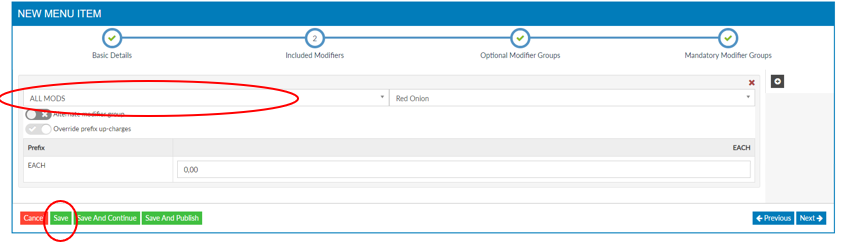
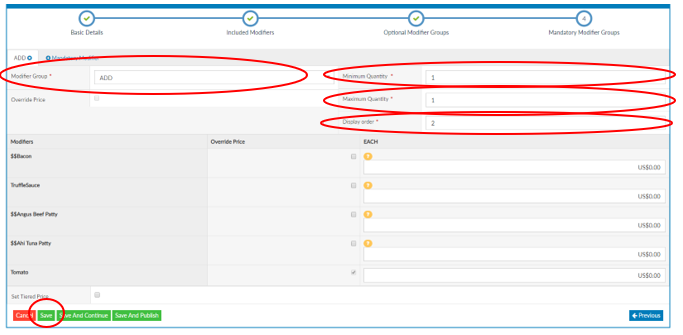
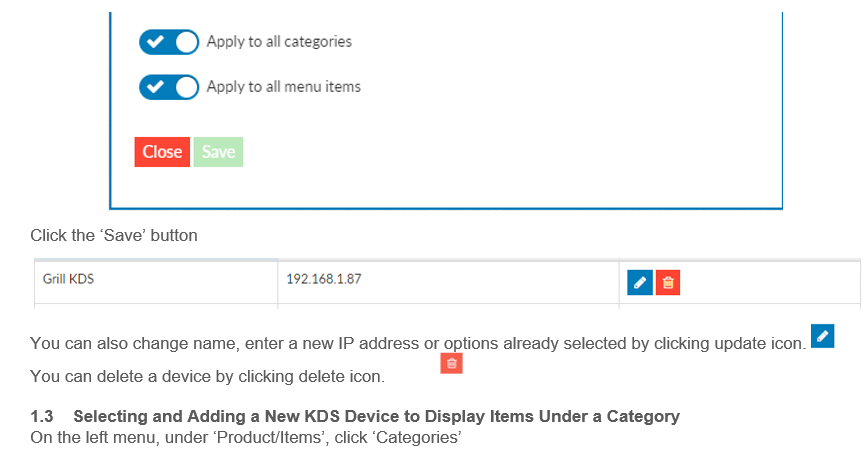
Apply To All Categories: Enable if the KDS device is to be set to display all the categories defined in back office. (Selecting categories to be displayed on KDS devices will be further explained in the next section).
Apply To All Menu Items: This option is visible only if ‘Apply To All Categories’ option is enabled. Enable this option if the KDS device is to be set to display all the menu items defined in back office. (Selecting menu items to be displayed on KDS devices will be further explained in the next section).
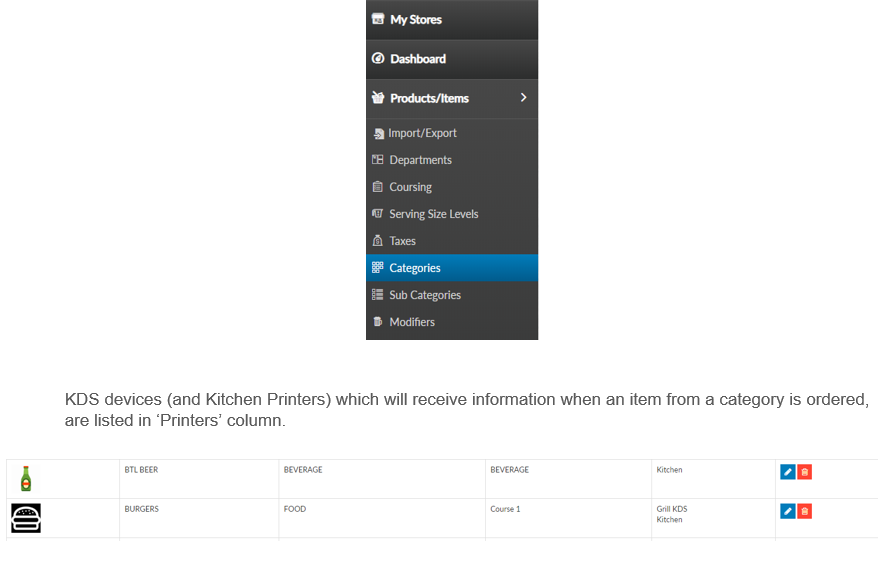
1.4 Selecting and Adding a New KDS Device to Display Items Under a Subcategory
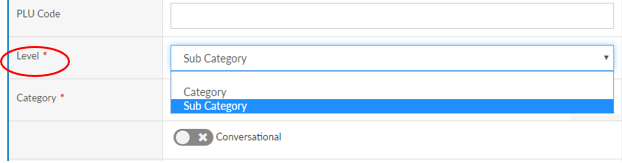
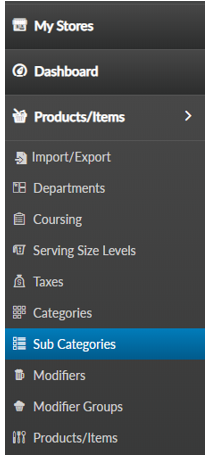
On the left menu, under ‘Product/Items’, click ‘Sub Categories’
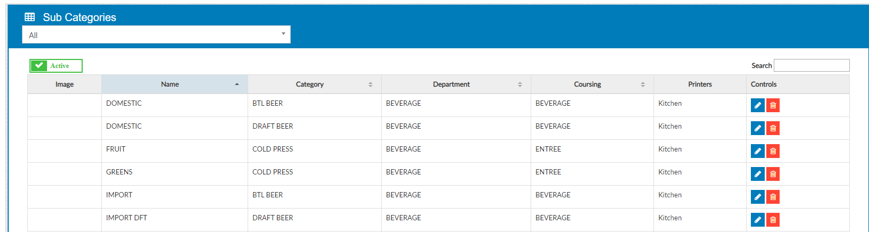
KDS devices (and Kitchen Printers) which will receive information when an item from a subcategory is ordered, are listed in ‘Printers’ column
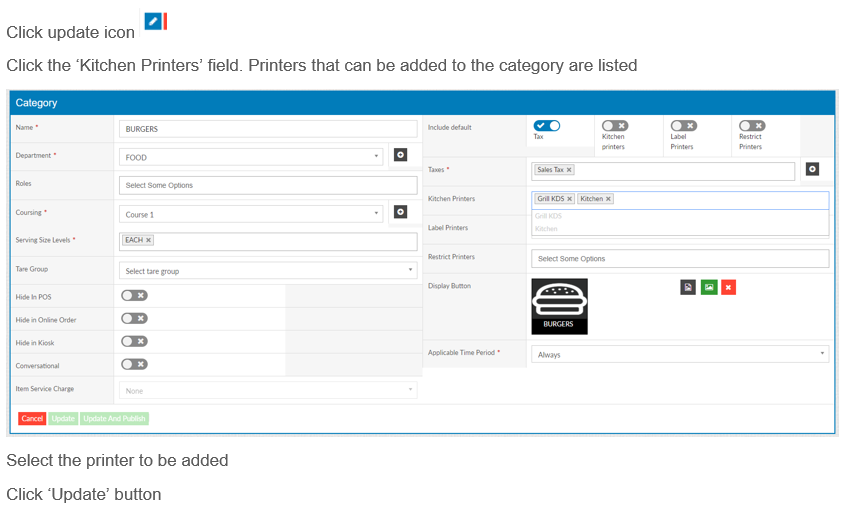
Click update icon
Click the ‘Kitchen Printers’ field. Printers that can be added to the subcategory are listed
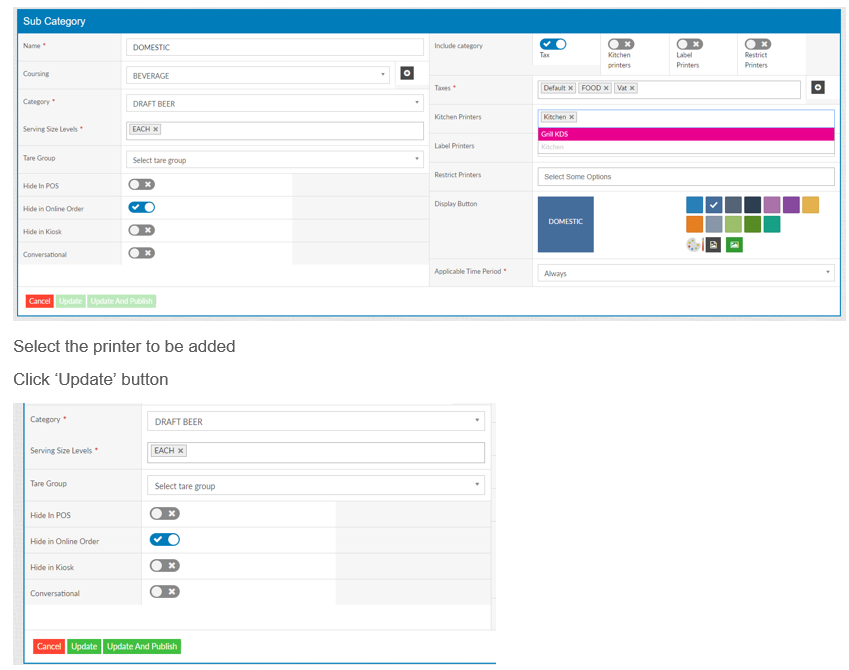
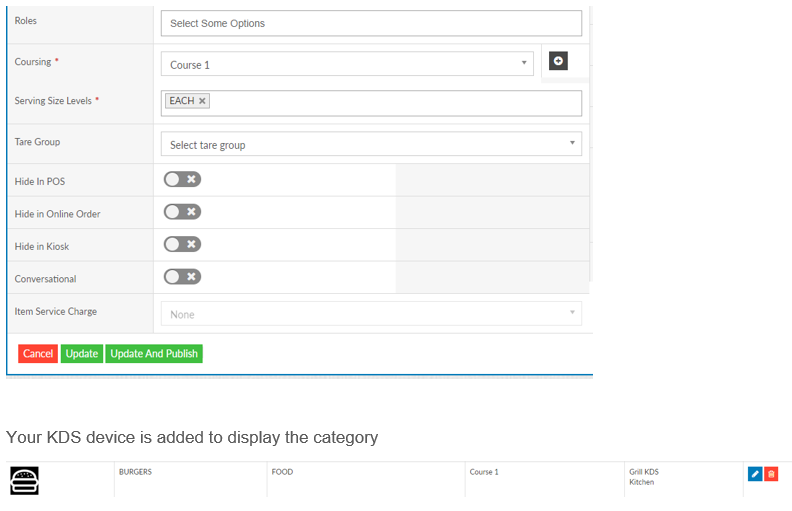
Your KDS device is added to display the subcategory
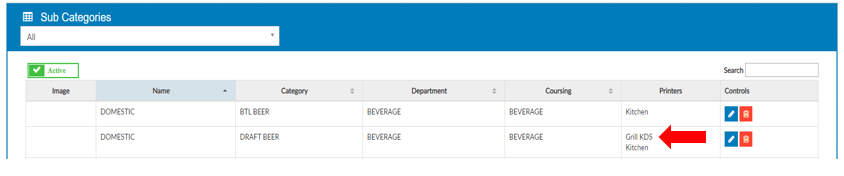
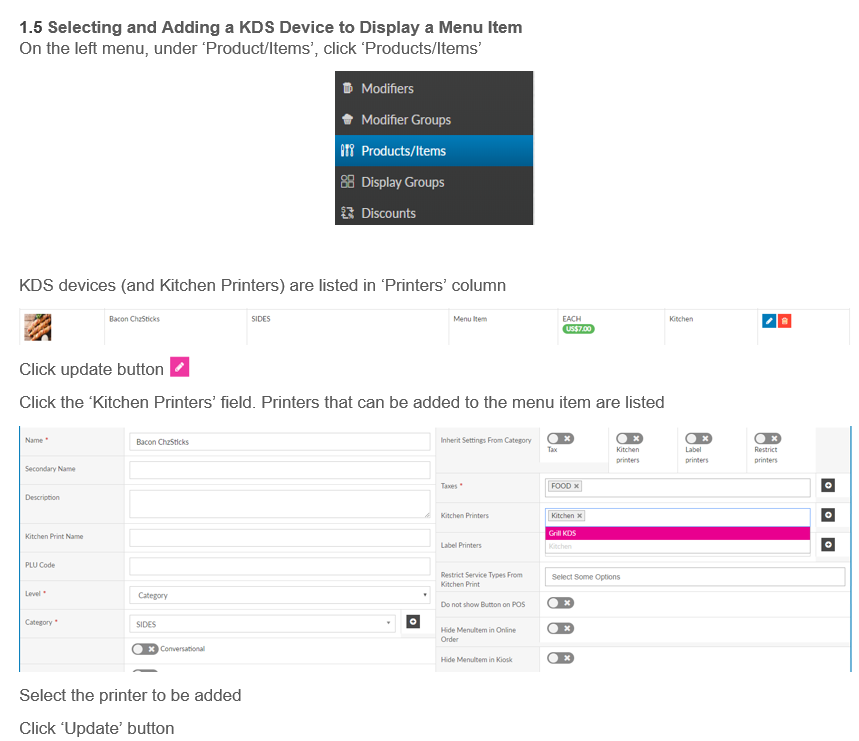
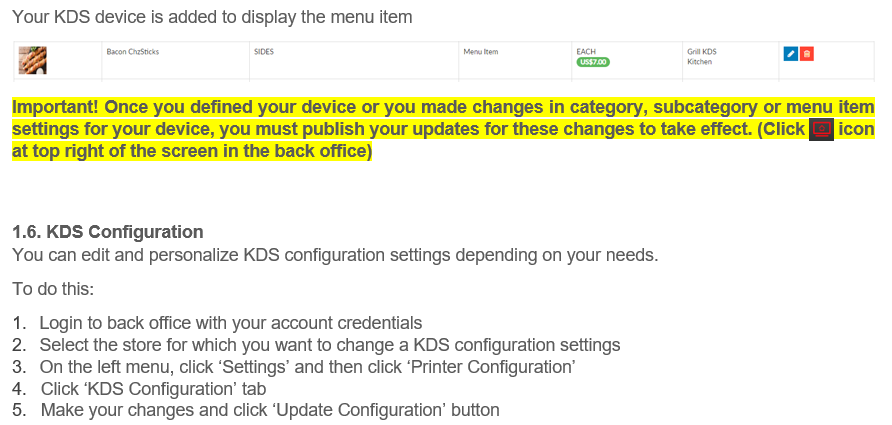
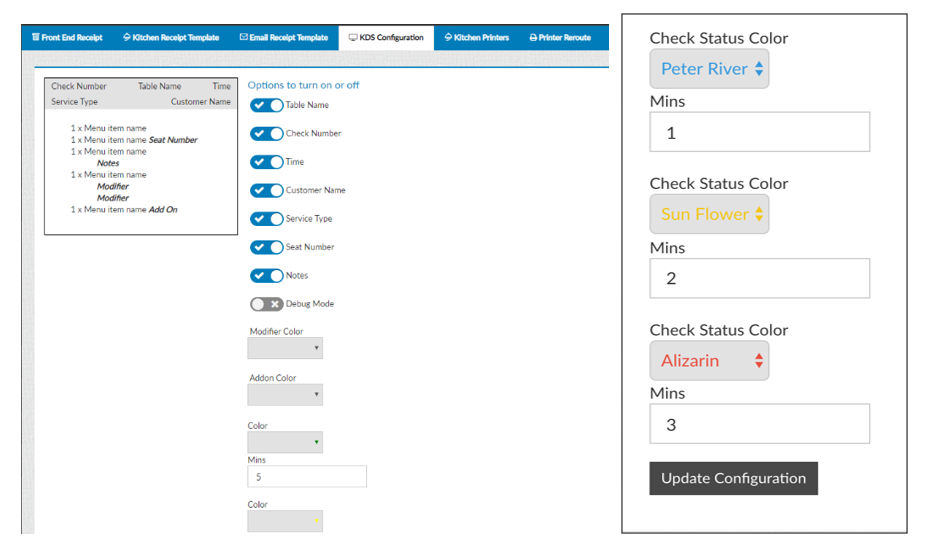
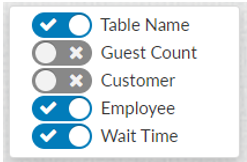
Table name: Enable this option if you want table names to be displayed in checks.
Check number: Enable this option if you want check numbers to be displayed in checks.
Time: Enable this option if you want preparation time to be displayed in checks.
Server name: Enable this option if you want server names to be displayed in checks.
Server type: Enable this option if you want server types to be displayed in checks.
Seat number: Enable this option if you want seat numbers to be displayed in checks.
Notes: Enable this option if you want notes to be displayed in checks.
KDS Done Button: Enable this option if you want to use ‘Serve’ button on KDS devices (except expo).
Modifier Color: Select the modifiers display color.
Add-on Color: Select the add-ons display color.
Check Status Color(s): Select the Check Status display color. Colors change depending on completion of the period set in ‘Mins’ fields.
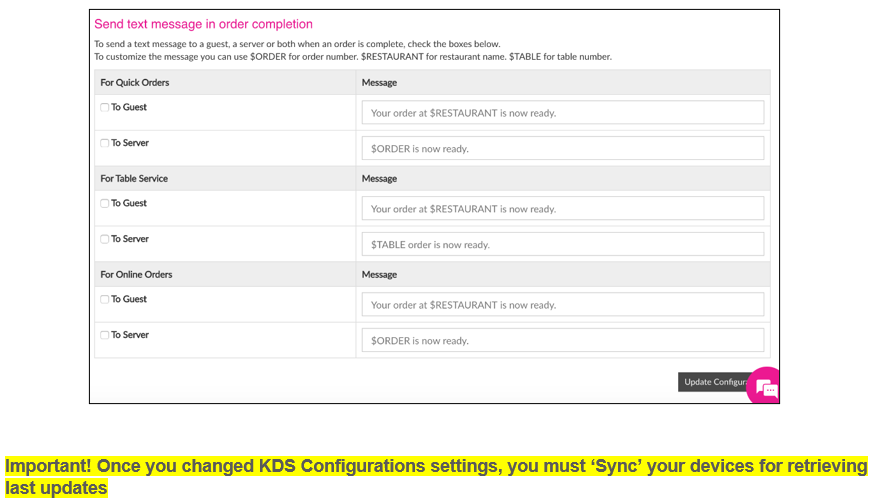
Send SMS Text Message in Order Completion: You can determine SMS text messages that will be sent to a server or a guest in order completion, according to service types.
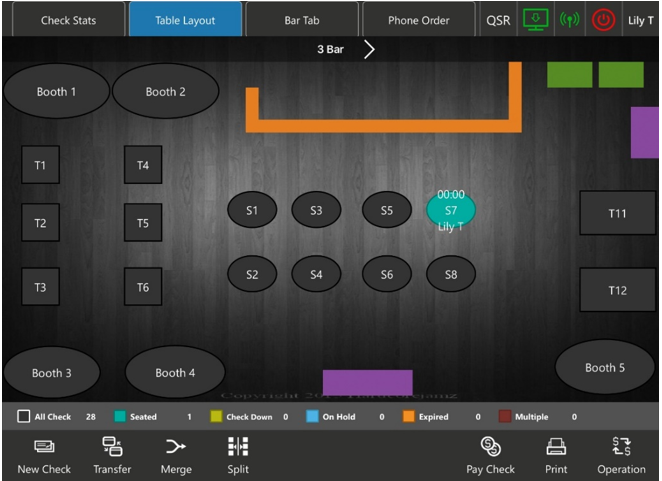
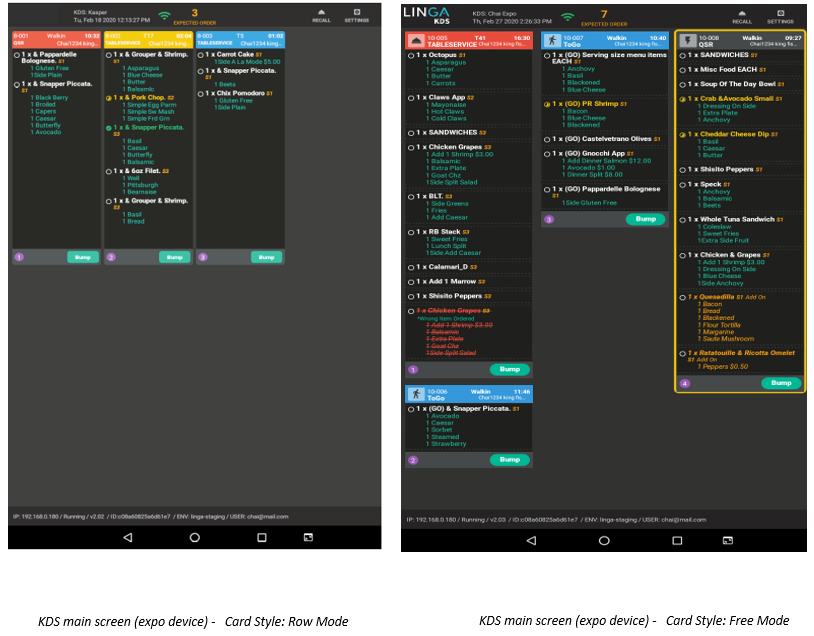
Connection Status: Connection status icon appears green when connected (and red when disconnected).
Expected Order: Number of processing orders.
Device Name: Device name set in the back office.
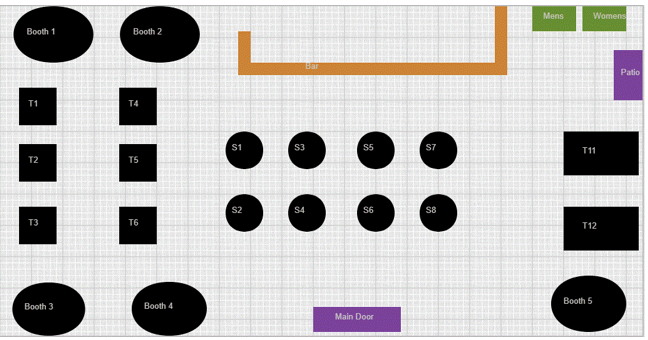
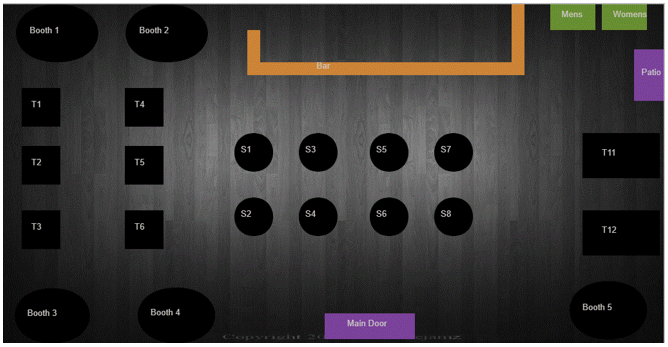
Table name: For table services, table name/number defined in back office. For delivery, e.g. ‘Walkin’.
Check number: Rank of the check between all the checks displayed on the screen.
Server name: Name of the serving employee.
Service type: e.g. Table, ToGo, Phone ToGo, Phone Delivery etc.
Timer: Time counter starting to count when orders is first received by the device.
Seat Number: Seat number (for table service).

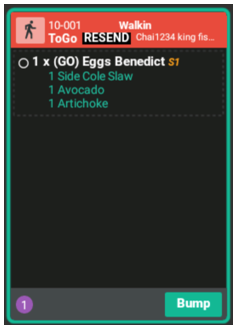
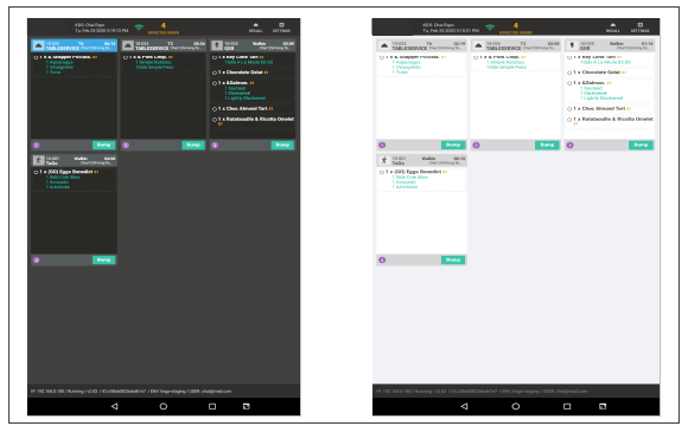
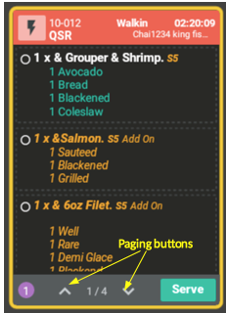
For orders that exceed the standard card size, other items in the card can be seen with paging up or down
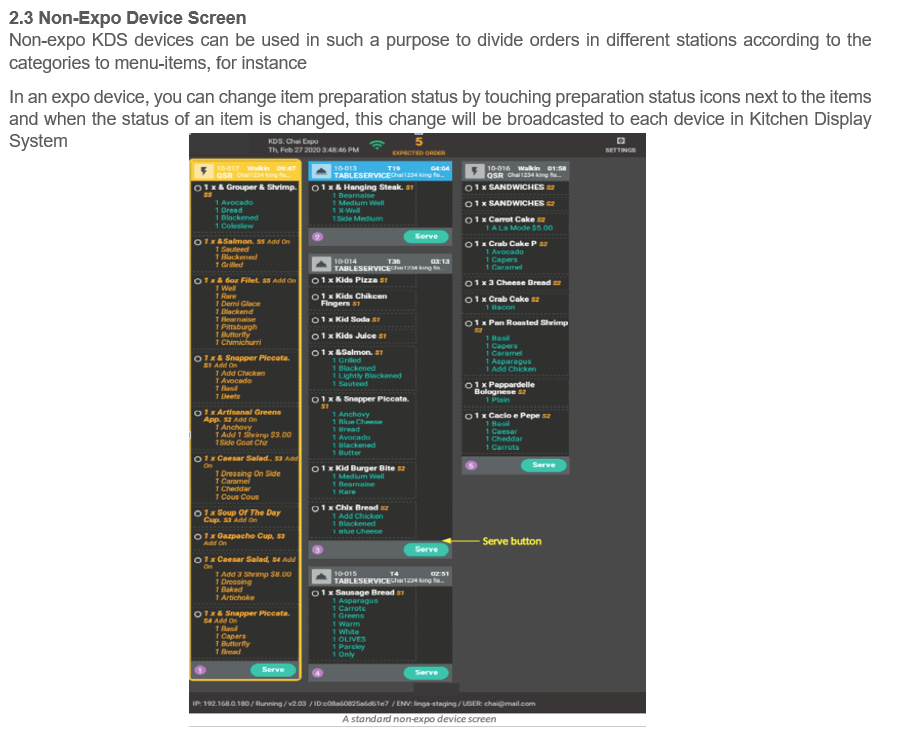
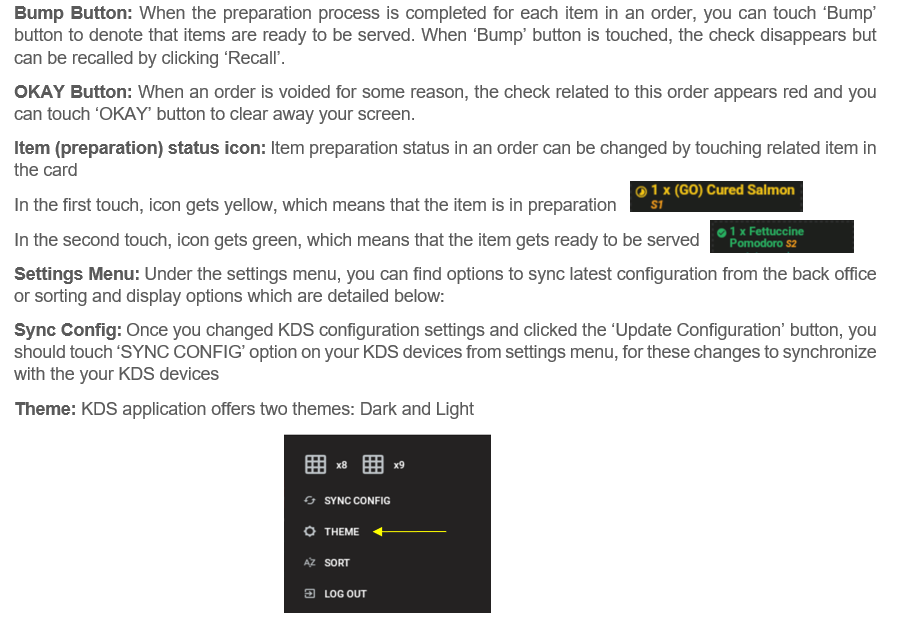
In an expo device, you can change item preparation status by touching preparation status icons next to the items and when the status of an item is changed, this change will be broadcasted to each device in Kitchen Display System.
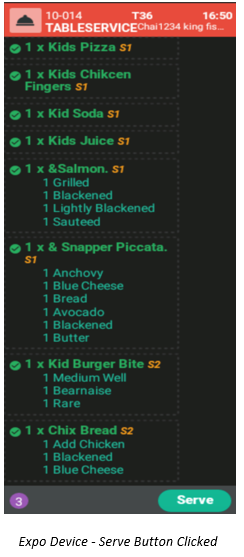
If all the items in an order are ready to be served, user can touch ‘Serve’ button to set to ready all the items’ status in the order. When user touches ‘Serve’ button, the check disappears in the non expo device, whereas all the items’ status are set automatically to ‘Ready to serve’ (Green) in the expo device. (However, when user touches an item to adjust its status to ‘not ready’ or ‘in preparation’ (yellow), the card will reappear in non-expo devices)
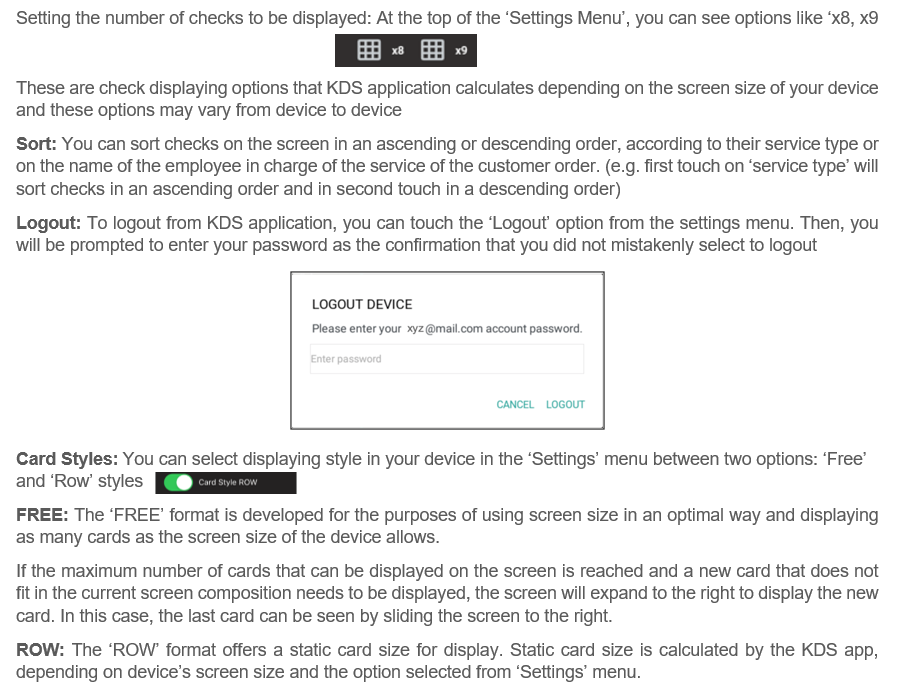
In the ‘Settings’ menu, you can select your devices displaying, card ordering settings as described in earlier sections
If all the items in an order are ready to be served, user can touch ‘Serve’ button to set to ready all the items’ status in the order. When user touches ‘Serve’ button, the check disappears in the non expo device, whereas all the items’ status are set automatically to ‘Ready to serve’ (Green) in the expo device. (However, when user touches an item to adjust its status to ‘not ready’ or ‘in preparation’ (yellow), the card will reappear in non-expo devices)
In the ‘Settings’ menu, you can select your devices displaying, card ordering settings as described in earlier sections
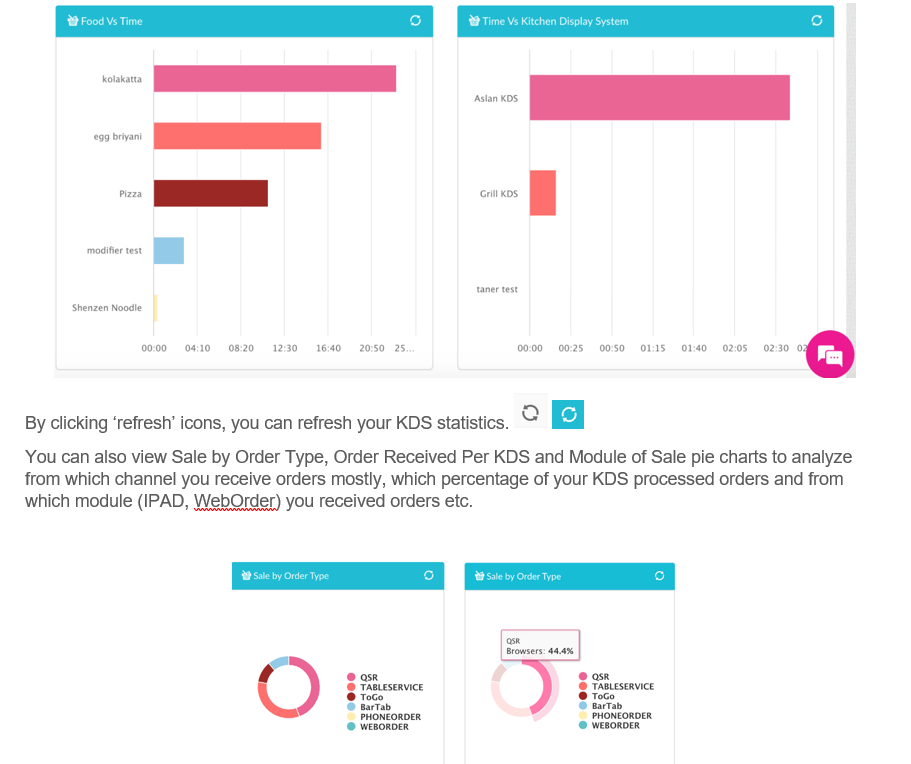
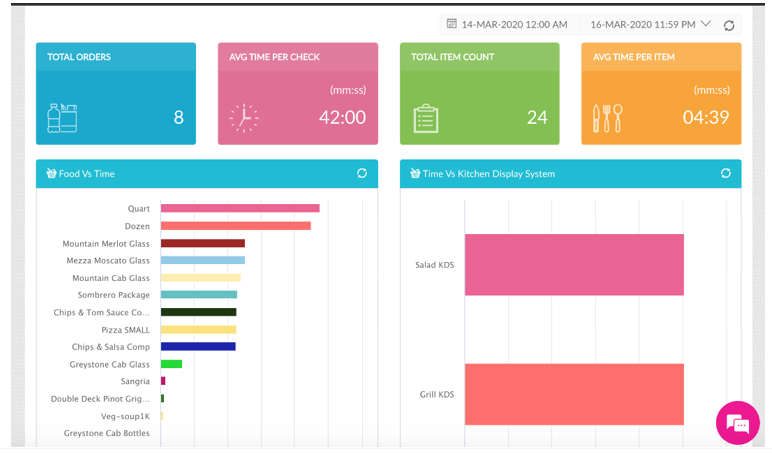
2.4 KDS Dashboard
In KDS Dashboard, you can view various statistics based on menu item, order type, preparation time of orders.
To access ‘KDS Dashboard’ screen:
Login to back office with your Linga credentials
In ‘My Stores’ page, select the store for which you want to view dashboard.
In the ‘Sale Dashboard’ page, click ‘KDS Dashboard’ tab to display KDS stats.
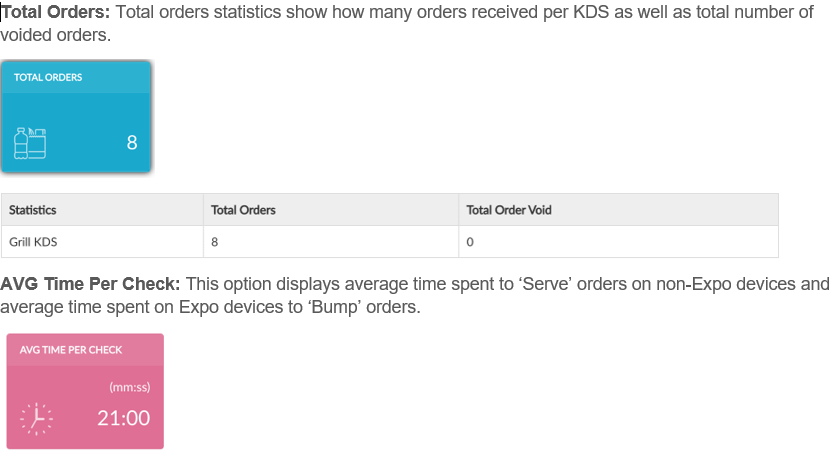
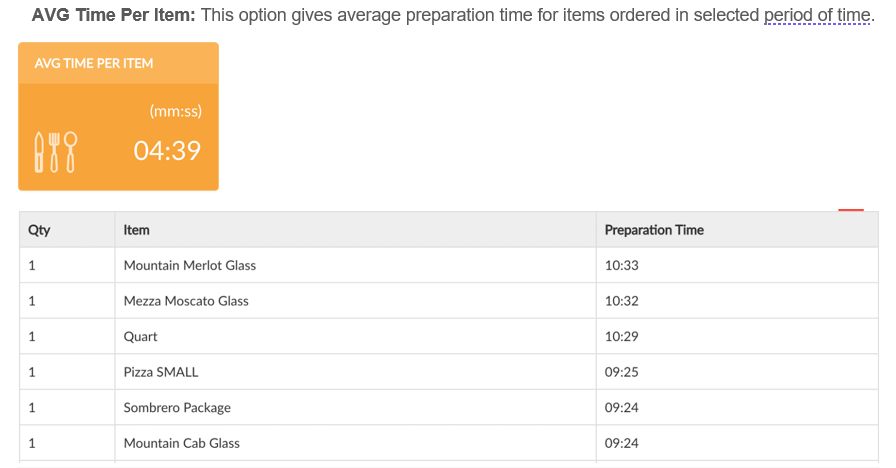
In KDS Dashboard screen, you can select ‘Total Orders’, ‘Avg Time Per Check’, ‘Total Item Count’ or ‘Avg Time Per Item’ option to see related stats. These options are described below:
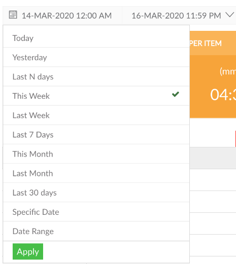
Time Period Options: You can select time period for which you want to display KDS statistics
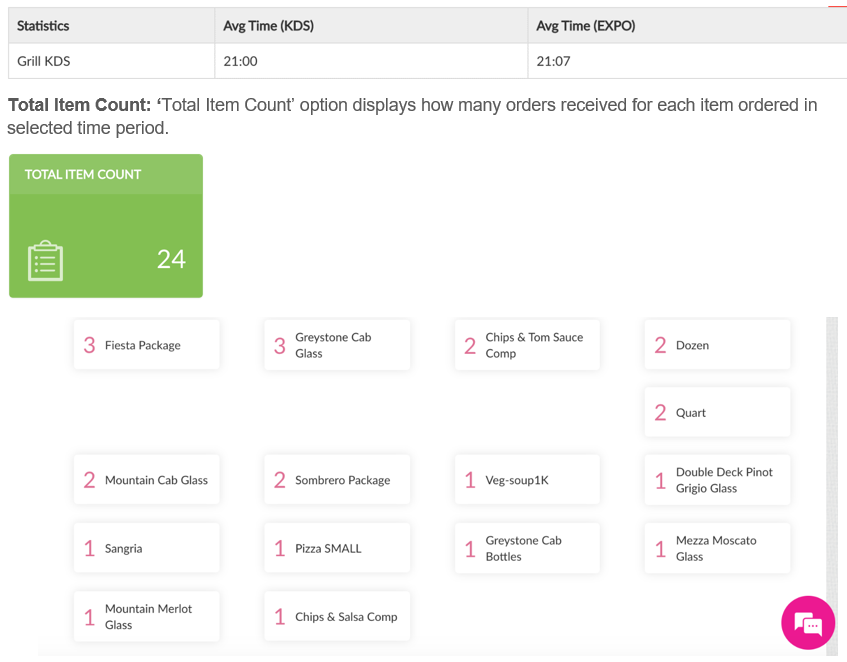
In KDS Dashboard, you can also view items preparation time and average time spent in your KDS devices (expo or non-Expo) in chart format.